Skip to content
 cust@legendarchery.com
 302 503 5767
 Westfield IN 46074

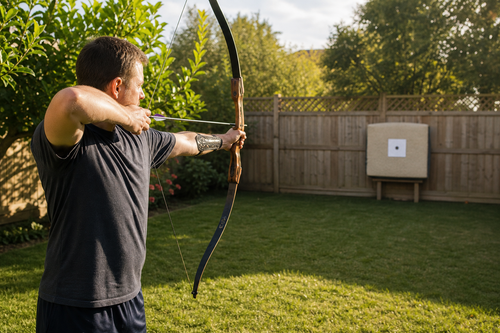
Your hands are the only contact points between you and the bow throughout every shot. Get them right and everything downstream — alignment, release, arrow flight — becomes easier to control. Get them wrong and no amount of expensive equipment will fix your groups. This guide covers exactly how to position both the bow hand and the draw hand for cleaner, more repeatable shots.
Why Hand Position Has Such a Big Impact on Accuracy
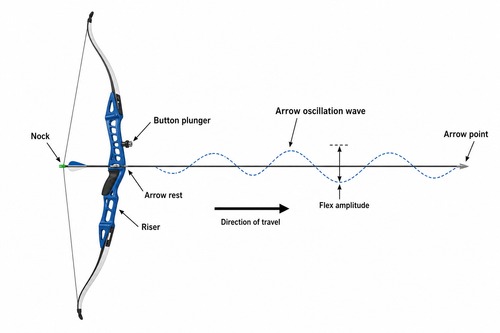
Most form errors that show up downrange actually start at the hands. The bow hand transfers force directly into the riser, so any unintended pressure or rotation creates torque that steers the arrow off its intended path. The draw hand controls string alignment and release quality, which directly affects how cleanly the string leaves your fingers.
Neither hand works in isolation. A poor grip on the bow can cause the archer to compensate with the draw hand, and vice versa. Understanding each hand's role individually — and how they work together — is the foundation of reliable archery form.
The Bow Hand: Grip, Pressure Point, and Wrist Position
The bow hand is often called the grip hand, but that label is slightly misleading. You are not gripping the bow in the traditional sense. You are holding it with a relaxed, controlled contact that minimises torque while still supporting the draw weight.
Where the Pressure Should Land
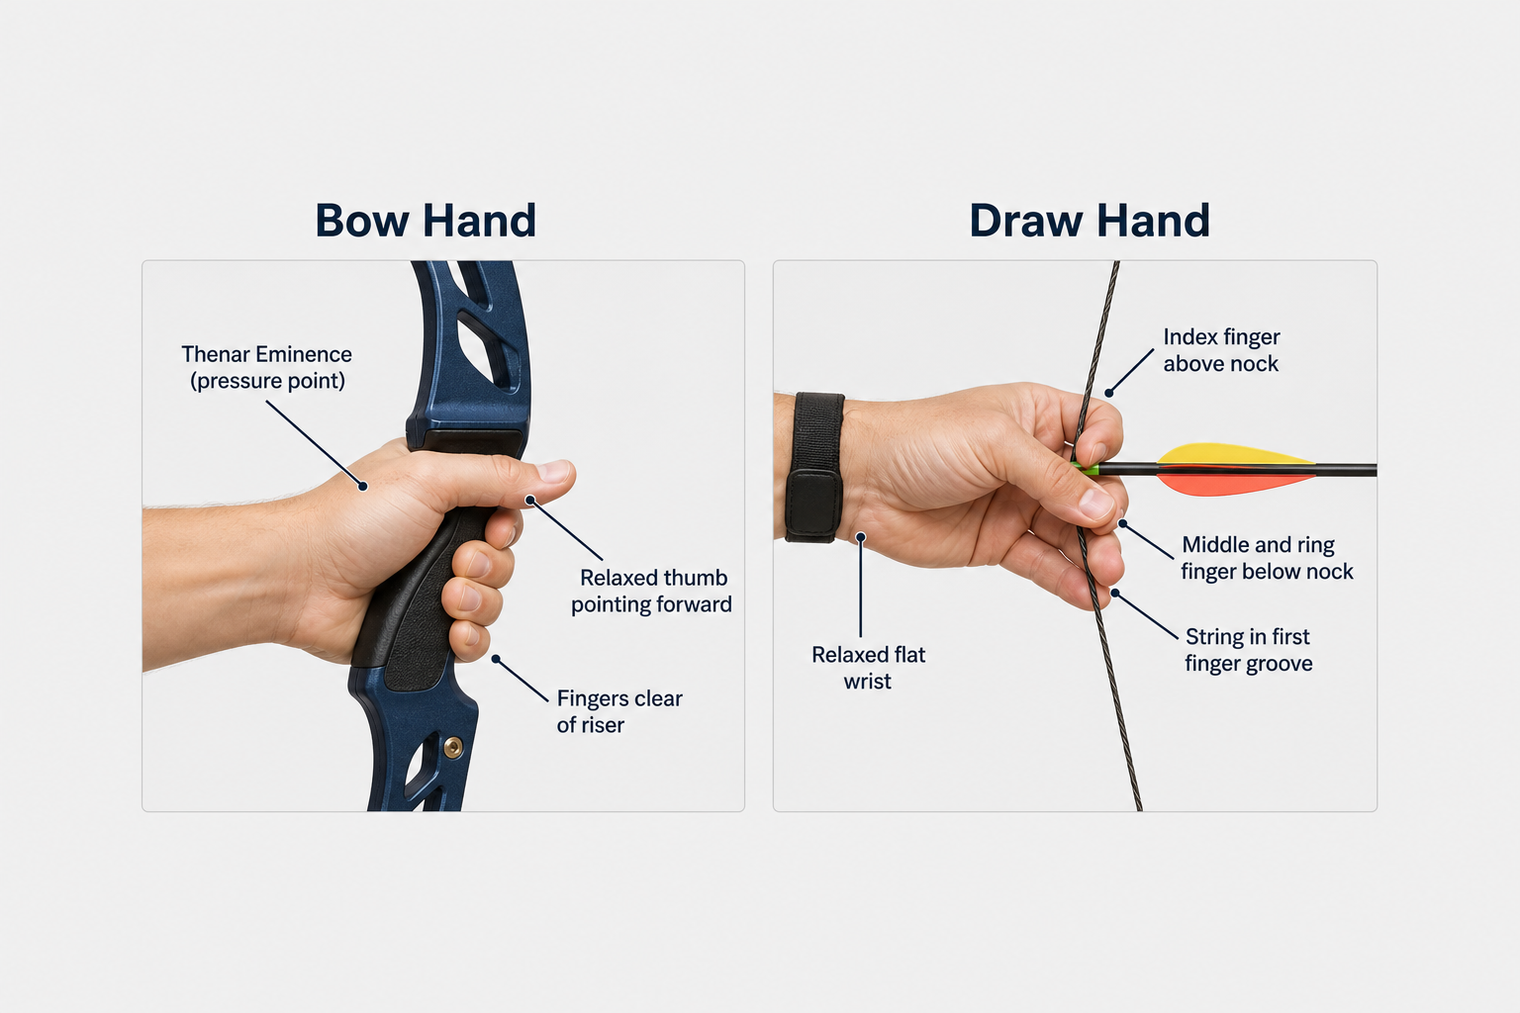
The correct pressure point on the bow hand is the thenar eminence — the fleshy pad at the base of the thumb, just below the knuckle. This pad sits naturally against the bow's grip shelf when the hand is properly positioned. Pressure here lets the bow push straight back against your hand along the draw force line, rather than rotating in your palm.
- Avoid gripping with the full palm — this wraps the fingers around the riser and introduces rotational torque.
- Keep the thumb relaxed and pointed forward, not wrapping over the front of the grip.
- The remaining four fingers should be lightly curled or extended out of the way, never tensed against the riser.
High Wrist vs Low Wrist
Archers debate two main wrist positions: high wrist (raised knuckles, lower grip contact) and low wrist (flatter hand, more palm contact). Neither is universally superior, but high wrist generally reduces forearm contact with the string and is common among recurve and barebow shooters. Low wrist is often preferred by compound archers using a wrist sling. Whatever your choice, the key is consistency — the same wrist angle, shot after shot.
A bow sling is useful here because it allows you to relax the bow hand completely after the shot without worrying about dropping the bow. Relaxation at the moment of release is where many archers lose consistency.
The Draw Hand: Finger Placement, Hook, and Anchor
The draw hand pulls the string back and, in finger shooting, directly releases it. Its positioning affects string alignment before the shot and how cleanly the string clears the fingers at release.
The Three-Finger Hook
The most common draw technique for recurve and traditional archers is the Mediterranean draw: one finger above the arrow nock, two fingers below. The string sits in the first groove of each finger — the joint closest to the fingertip — not deep in the palm. A deep hook creates a slow, dragging release. A hook too shallow risks the fingers slipping during the draw.
- Keep the back of the draw hand relaxed and relatively flat, not cupped or tensed.
- The thumb should be tucked comfortably away from the string — not pressing against the palm, not extended outward.
- The little finger can remain relaxed or lightly tucked; it should not interfere with the drawing fingers.
The Release Aid Draw (Compound Archers)
Compound archers using a mechanical release aid have different draw hand requirements. The hand still needs a consistent and relaxed wrist position, but instead of finger pressure on the string, you are triggering a mechanical device. The draw hand should stay relaxed at the wrist, with the trigger finger applying steady, even pressure rather than a sudden punch or jerk. Punching the trigger — anticipating the shot and firing the release prematurely — is one of the most common accuracy problems in compound shooting and it originates entirely in the draw hand.
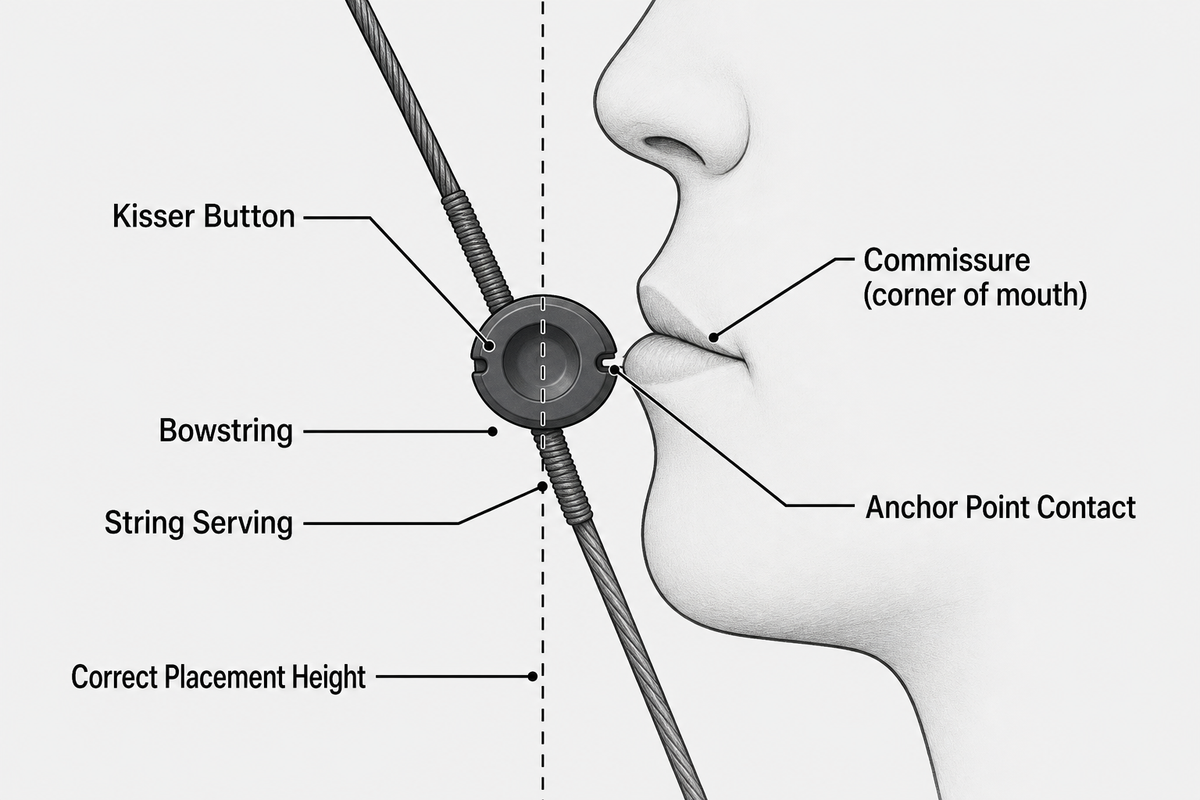
Anchor Point Consistency
The anchor point is where the draw hand comes to rest on the face at full draw. It must be identical on every shot. For recurve archers, the index finger typically touches the corner of the mouth or the chin, with the string touching the nose and lips. For compound archers, the anchor is often lower on the jaw, with the peep sight used to confirm alignment.
If you are still developing your understanding of archery bows and how different bow types affect your shooting style, it is worth noting that anchor points vary between disciplines — what works for a traditional longbow may not transfer directly to a compound setup.
Common Hand Position Mistakes to Avoid
Even experienced archers slip into these habits, particularly when fatigued or rushing between shots.
- Death grip on the bow: Squeezing the riser rotates it at the moment of release, sending shots consistently left or right depending on your dominant hand.
- String fingers too deep: Hooking the string too far into the palm slows down the release and introduces lateral string movement.
- Inconsistent anchor: Moving the draw hand even a few millimetres between shots changes effective draw length and sight picture.
- Tensing the draw hand wrist: A bent or flexed wrist at full draw creates string clearance issues and alters release direction.
- Thumb pressing the riser: The bow hand thumb should point forward naturally — if it presses against the side of the grip, it adds unwanted lateral torque.
- Collapsing on release: Some archers relax the bow arm or draw elbow too early, moving both hands before the arrow has fully cleared the rest.
Building Better Hand Position Through Repetition
Hand position is a feel-based skill. Reading about it helps, but the muscle memory only develops through deliberate, mindful practice. A few approaches that accelerate the process:
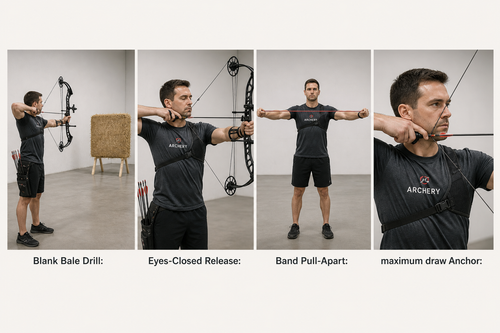
- Blank bale practice: Shoot at very close range — two to three metres — with no target, focusing entirely on how each hand feels at full draw and through the release. Remove the goal of hitting something so you can concentrate on sensation.
- Slow-motion video review: Even a basic smartphone mounted to a tripod can reveal torque, grip tension, or anchor inconsistency that you cannot feel in the moment.
- Use a finger tab or glove: The right tab improves the consistency of string contact across the draw fingers. Poor contact surface is often an unacknowledged cause of inconsistent releases.
- Work with a coach: Hand position faults are among the hardest self-diagnose, because they often feel normal even when they are consistently wrong.
If you are setting up a new practice space or shopping for gear to support your training, exploring outdoor archery supplies can help you find the accessories that complement good technique development.
Frequently Asked Questions
How do I know if my bow hand grip is causing torque?
Look for a consistent horizontal pattern in your shot groups — arrows landing consistently left or right at the same distance. You can also watch the bow immediately after release: if it rotates noticeably in one direction rather than falling forward naturally, grip torque is likely the cause. Filming your shots from the front or side often reveals this clearly.
Does draw hand position matter as much for compound archers using a release aid?
Yes, though the specifics differ. The draw wrist position, anchor point, and the way you engage the release trigger all have a direct effect on accuracy. A tense wrist or an inconsistent trigger pull creates the same downstream problems as poor finger technique does for traditional shooters — just through a different mechanism.
What are the most common beginner mistakes with hand placement?
Gripping the bow too tightly and anchoring the draw hand inconsistently are the two most frequent beginner issues. Both feel like they should help — more grip seems more secure, and an imprecise anchor is easy to overlook when you are focused on aiming — but both actively work against accuracy. Establishing a relaxed bow grip and a fixed anchor point early saves a lot of corrective work later.
How long does it take to develop consistent hand position?
There is no universal answer, but most archers who practise deliberately — rather than just shooting for score — notice meaningful improvement in a few weeks. True muscle memory that holds under pressure takes longer, often several months of consistent repetition. Short, focused sessions tend to build better habits than long sessions where fatigue degrades form.
Conclusion
Hand position is one of the few fundamentals that genuinely affects every single shot. Correcting your bow hand grip and draw hand placement will not instantly transform your scores, but it removes the inconsistency that prevents other improvements from sticking. Build these habits early and revisit them regularly — they are worth the attention at every level of the sport.