Skip to content
 cust@legendarchery.com
 302 503 5767
 Westfield IN 46074


If your arrows are flying inconsistently or grouping poorly, the bow — not your form — might be the problem. This guide is written for intermediate archers who have some range time behind them and want to dial in their setup properly. It also suits beginners who have just bought their first recurve bow and want to start on the right foot. We'll go through every stage in sequence, so you can work methodically rather than guessing.
Why Proper Bow Tuning Matters
A bow that is out of tune creates inconsistency that no amount of technique can fully correct. When the nocking point is too high, arrows will kick upward off the rest. When brace height is too short, the string dwells on the arrow longer than it should, amplifying any release imperfection. Tuning brings the bow into a mechanical state where it works with your shot, not against it. The result is tighter groups, more forgiving arrow flight, and a setup that gives you honest feedback about your form rather than masking it with unpredictable noise.
What You Need Before You Start
Gather the following tools before you touch the limbs or string. Trying to tune without them means guessing at measurements you should be reading precisely.
- Bow stringer — always use one. Stringing by hand risks twisting a limb or dry-firing if the string slips.
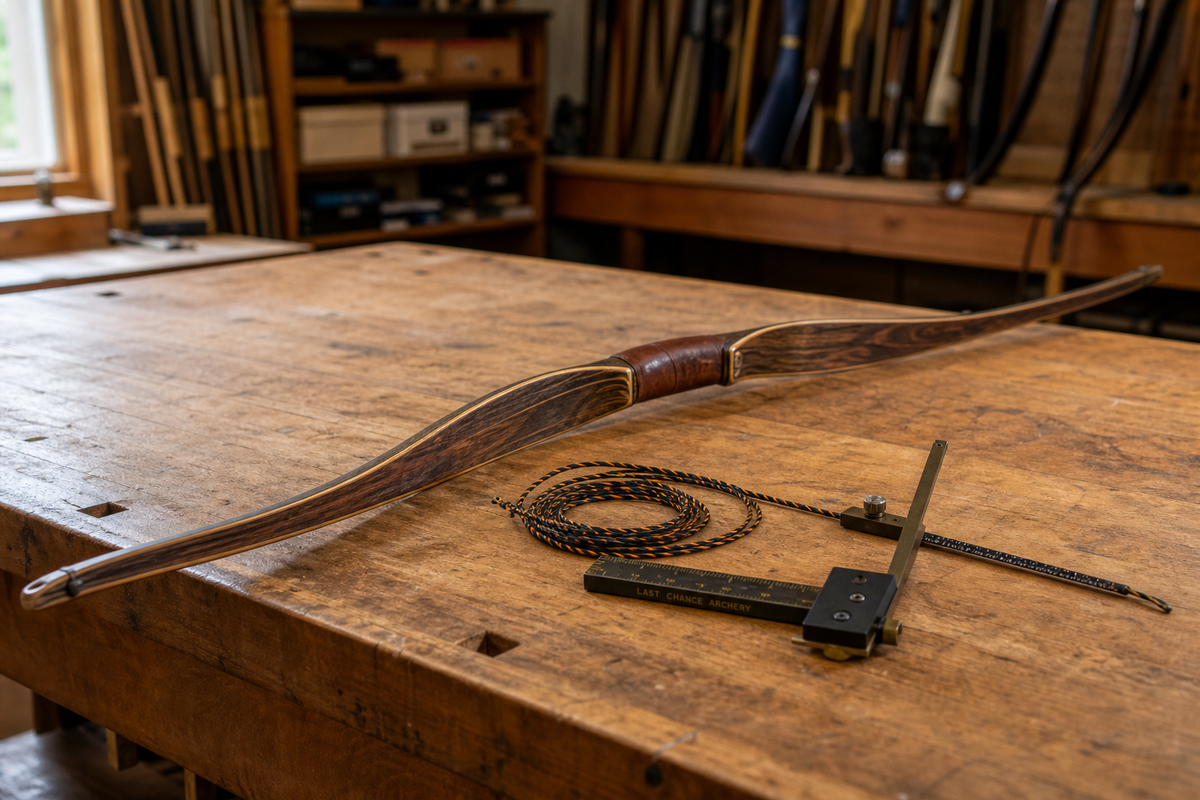
- Bow square (T-square) — for measuring brace height and nocking point position accurately.
- Nocking pliers — for setting and crimping brass nock sets cleanly.
- Brass nock sets or a tied serving nock — your choice, but brass sets are easier to reposition during tuning.
- Digital scale or draw weight scale — useful if you want to verify tiller balance.
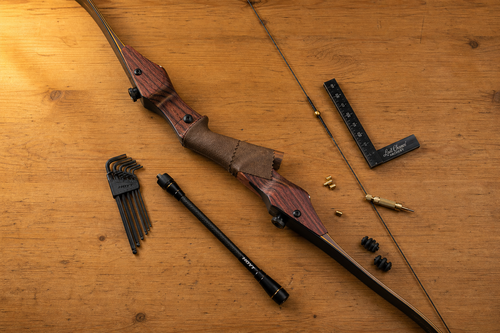
- Allen keys (hex wrenches) — for adjusting the arrow rest and plunger button if fitted.
- Paper frame or cardboard sheet — for paper tuning at close range.
- A consistent set of arrows — matched spine, same length and point weight. Never tune with mismatched arrows.
If you are shooting a takedown model, also check that all riser bolts are tight before starting. Loose limb pockets produce inconsistent results that tuning cannot fix.
Step-by-Step Tuning Process
Step 1: Set Brace Height
Brace height is the distance from the deepest part of the grip (the pivot point) to the string. Every bow model has a recommended range, typically noted on the limb or in the manufacturer documentation. Start at the middle of that range. Use your bow square hooked over the string and resting against the grip to get an accurate reading.
To adjust brace height, twist or untwist the string. More twists shortens the string and raises brace height. Fewer twists lowers it. Make changes in small increments — three or four twists at a time — then re-measure. Shoot a few arrows at each setting and note the feel and sound. A well-tuned brace height tends to produce a quieter, more solid thud rather than a sharp crack or a dull slap.
Step 2: Check and Adjust Tiller
Tiller is the difference in distance between the string and each limb at the limb-to-riser junction. It affects how the limbs load and unload symmetrically during the shot. Measure from the base of each limb (where it meets the riser pocket) straight to the string. For most finger shooters, a slightly positive tiller — where the top limb measurement is around 3 to 6 mm greater than the bottom — is a good starting point. Some archers prefer zero tiller (equal top and bottom), depending on their grip and finger position.
Tiller is adjusted by turning the limb bolt. Tightening draws the limb closer to the riser and reduces that limb's tiller measurement. Make small adjustments and remeasure each time. Do not adjust one limb dramatically without rechecking brace height, as tiller changes can affect the string's overall tension and therefore brace height slightly.
Step 3: Set the Nocking Point
The nocking point tells the arrow where to sit on the string. Clip your bow square over the string and rest it on the arrow shelf. Most finger shooters start with the nocking point set so that the bottom of the nock is approximately 6 to 10 mm above square (above 90 degrees to the string). This accounts for the downward pressure that three-finger tab shooting naturally applies to the arrow.
Crimp a brass nock set above the nock position first. Many archers also add a second one below, which keeps the arrow from sliding down the string during the shot. Leave both slightly loose until you've confirmed the height through paper tuning in a later step.
Step 4: Align the Arrow Rest and Plunger
If you are using a basic stick-on rest, make sure the arrow sits level or very slightly above horizontal when viewed from the side. The arrow should also pass directly in line with or just inside the pivot point of the grip when viewed from above — this is your centre shot setting. A clicker-style rest or a pressure button (plunger) allows finer lateral adjustment. Set the plunger button spring tension to a medium firmness to start; this can be refined through paper tuning.
Step 5: Paper Tune
Paper tuning is the clearest way to read how the arrow is leaving the bow. Set up a sheet of paper in a frame, stood vertically, with a blank target backstop behind it. Stand about two metres away and shoot through the paper with a consistent, clean shot. The tear pattern tells you what the arrow is doing:
- Clean bullet hole or small round tear — arrow is flying well, no change needed.
- Tail-high tear — nocking point is likely too high; lower it slightly.
- Tail-low tear — nocking point is too low; raise it.
- Tail-left tear (for a right-handed archer) — arrow is flexing too much; increase plunger pressure or try a stiffer spine.
- Tail-right tear (for a right-handed archer) — arrow may be too stiff; decrease plunger pressure or try a softer spine.
Make one small change at a time and shoot three or four arrows before re-evaluating. Never change multiple variables simultaneously or you lose track of what is actually working.
Common Mistakes to Avoid
- Changing too many things at once. Adjust one variable, shoot a group, then assess. If you change brace height and nocking point simultaneously, you won't know which one fixed — or caused — the problem.
- Tuning with inconsistent arrows. Mixed arrow spines or different point weights will produce different tears and make the data useless. Use a matched set.
- Ignoring form issues during tuning. Paper tuning reads both bow and archer. If your release is inconsistent, the paper will show different tears on every arrow. Sort your form before drawing conclusions from paper.
- Setting brace height outside the manufacturer's range. Going too low risks string slap against the forearm and stress on the limbs. Going too high reduces power and can cause erratic nock travel.
- Skipping tiller checks entirely. Many beginners tune brace height and nocking point and leave it there. Neglecting tiller means the limbs may be loading unevenly, reducing consistency and potentially stressing the bow over time.
- Crimping the nock set before confirming height. Lock it in too early and you have to start over. Keep it snug but moveable until paper tuning confirms the position.
How to Check Your Result
Once you've worked through the steps above, step back to a realistic shooting distance — around 18 metres is ideal for indoor range work — and shoot a full end of six arrows. You are looking for groups that are consistent in pattern even if they are not yet centred on the target. Consistent grouping with an off-centre impact usually means your sight needs adjustment. Scattered grouping with no clear pattern points to either form inconsistency or a tuning element that still needs attention.
A simple walk-back test can also help. Set a vertical piece of tape on a target, aim at the same point at 10, 18, and 25 metres without moving your sight. If the arrow impacts drift consistently left or right as distance increases, your centre shot needs fine tuning. If they drift vertically in a straight line, your brace height and nocking point are well set.
If you're transporting your bow regularly to the range, keeping it properly stored protects your setup between sessions. A quality recurve bow case prevents limb warps and string damage that can knock your tune out of alignment without you realising it.
Frequently Asked Questions
How do you tune a recurve bow step by step without experience?
Start with brace height in the middle of the recommended range, then set tiller to slightly positive, then place your nocking point at around 6 to 8 mm above square. Align your arrow rest to centre shot, then use paper tuning at close range to refine the nocking point and plunger pressure. Work through each step in sequence and make only one change at a time. Most beginners get a workable tune within one to two range sessions if they follow this order consistently.
What are the most common mistakes people make when tuning?
The biggest errors are changing multiple settings at once, using mismatched arrows, and trying to paper tune through inconsistent form. Another frequent issue is setting brace height outside the bow's recommended range in search of a better sound or feel, which usually creates new problems rather than solving existing ones.
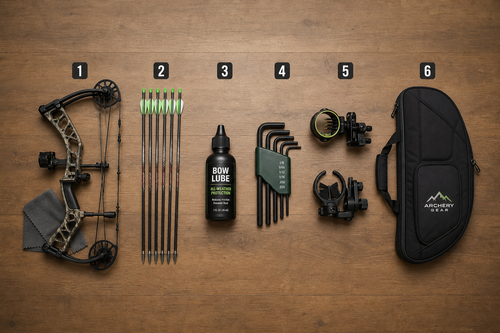
What tools do you actually need to tune a recurve bow?
The essentials are a bow stringer, a bow square (T-square), nocking pliers, and brass nock sets. A sheet of paper for paper tuning and a consistent set of matched arrows complete the kit. A plunger button is not strictly essential for a beginner setup but makes lateral tuning adjustments significantly easier and is worth adding once you are shooting regularly.
How can you tell if your bow is tuned correctly?
Arrow flight will look clean and straight from the side with minimal fishtailing or porpoising. Paper tuning will produce a round or near-round tear. At realistic distances, your groups will be consistent in size and shape. The bow will also feel and sound quieter at the shot compared to an out-of-tune setup.
Final Notes
Tuning is not a one-time task. As strings bed in, limbs settle, and your draw weight or arrow choice changes, revisit these steps. A well-tuned setup should be checked at the start of each new season at minimum. If you are in the market for a new bow and want to start the process on reliable equipment, browsing a range of recurve bows with consistent limb tolerances makes the whole tuning process more straightforward from the beginning.