Skip to content
 cust@legendarchery.com
 302 503 5767
 Westfield IN 46074

Most archers reach a point where their bow feels close to right — but not quite. Before spending heavily on a new setup, it's worth exploring what you can adjust, wrap, add, or tune yourself. There are more practical DIY ways to customize your bow than most beginners realize, and many of them cost very little while making a real difference to fit, feel, and consistency.
Why Personalization Matters More Than Gear Upgrades
A bow that fits your body and style will always outperform an expensive one that doesn't. Manufacturers build bows to suit a broad range of shooters, which means the stock configuration is rarely perfect for any individual. Small adjustments to grip angle, draw weight, arrow rest position, and accessory placement can have a bigger impact on accuracy than switching to a higher-end model.
Customizing your own equipment also builds mechanical familiarity. When you know how your bow is set up and why, you troubleshoot issues faster and understand what changes actually help your shooting.
Core Principles Before You Start
Before diving into modifications, a few ground rules will save you time and protect your equipment.
- Work one change at a time. If you adjust multiple things at once, you won't know which change improved or hurt your shooting.
- Understand your bow's manual. Limb bolt adjustments, brace height ranges, and tiller measurements all have safe operating limits. Stay within them.
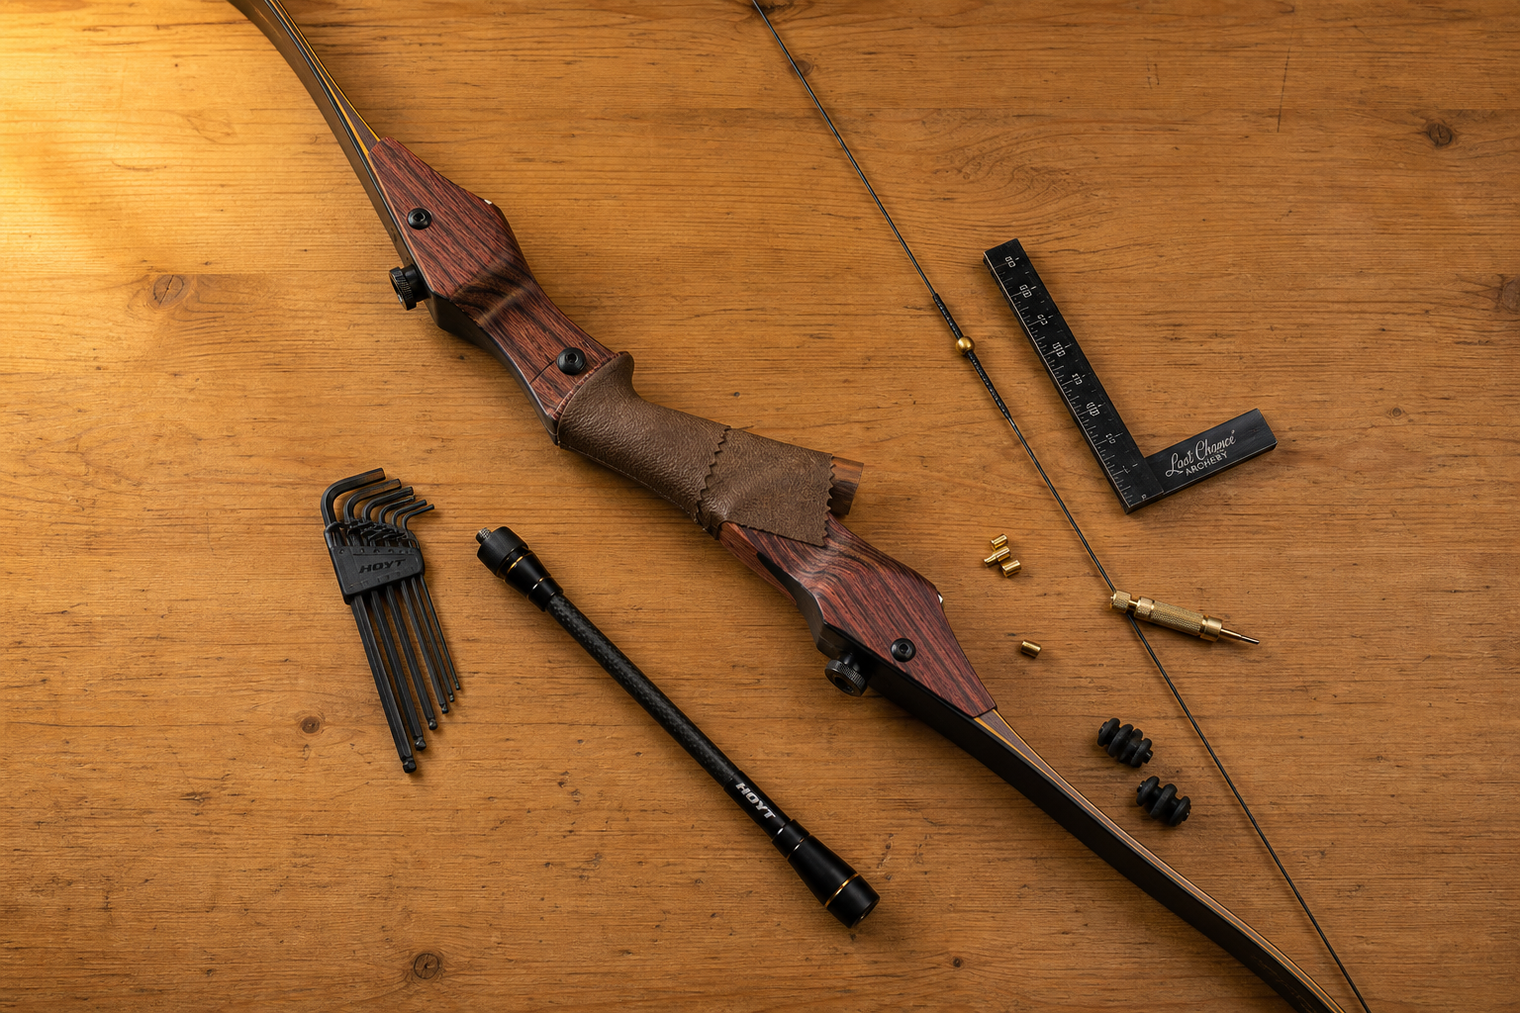
- Use proper tools. A bow square, Allen key set, and a simple bow press (for compound bows) prevent stripped bolts and damaged components.
- Document your starting point. Write down your current settings before changing anything so you can return to baseline if needed.
Practical Bow Customization Techniques
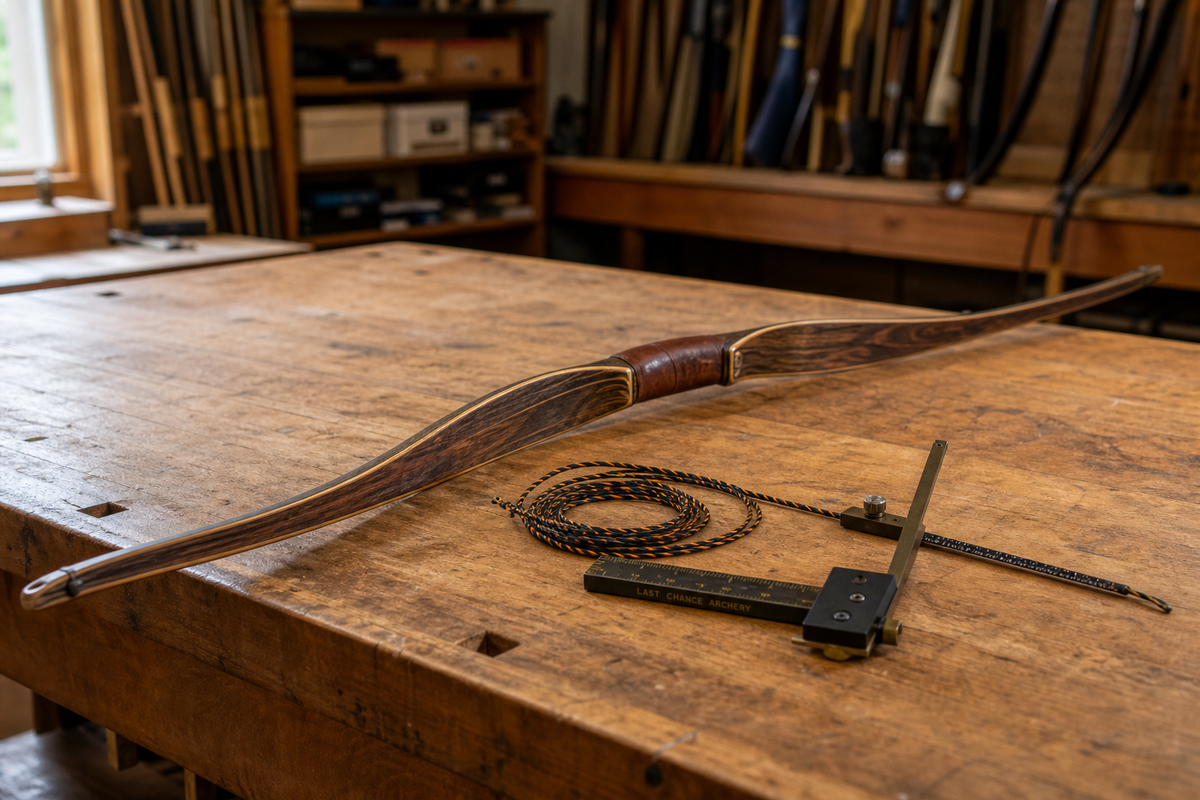
1. Wrap or Re-Grip Your Handle
The grip is your primary contact point with the bow. A stock grip made for average hand sizes may cause torque or discomfort during your shot. Grip tape, leather wraps, or purpose-made archery grip sleeves can change the feel dramatically without any permanent modification. Some archers even sand down a wooden riser grip slightly to reduce palm contact and encourage a more neutral thumb position.
For recurve bow users especially, grip shape has a direct effect on bow hand torque and, by extension, left-right arrow consistency.
2. Install or Adjust a Stabilizer
Stabilizers reduce vibration and help keep the bow balanced at full draw and through the shot. If your bow has a standard stabilizer bushing (most modern recurve and compound bows do), adding even a basic front stabilizer is a straightforward DIY upgrade. You can experiment with length and weight to find what balances naturally in your hand.
Side rods and v-bars are used more commonly in target archery and can be added progressively as your technique develops. Start with a single front rod before adding complexity.
3. Add String Silencers
String silencers are small rubber or fur attachments fitted to the bowstring that reduce vibration noise after the shot. They're inexpensive, easy to install without tools, and can make a noticeable difference in bow noise — useful for hunting setups or just for a cleaner shot feel. Beaver tail puffs and rubber cat whiskers are common options.
4. Tune Your Arrow Rest
An incorrectly positioned arrow rest is one of the most common sources of inconsistency that archers overlook. If you're shooting a recurve, check that your rest holds the arrow level and at the correct height relative to the berger button hole. For compound bows, a drop-away rest can be installed at home with careful attention to the timing cord attachment.
Rest micro-adjustments left, right, up, and down should always be paired with paper tuning or walk-back tuning to confirm the change is actually helping your arrow flight.
5. Adjust Draw Weight
Many recurve and compound bows allow draw weight adjustment within a stated range. On a recurve, this means swapping limbs or adjusting limb bolt depth at the riser pocket. On a compound, turning the limb bolts in or out (within manufacturer limits) raises or lowers peak draw weight. This is one of the most impactful and reversible changes you can make, particularly if you're returning from a break or managing shoulder fatigue.
If you're setting up a bow for a younger shooter, checking out purpose-built youth bows with adjustable draw weights will save a lot of frustration compared to modifying an adult setup.
6. Set Your Nocking Point
Nocking point placement affects arrow flight more than most beginners expect. A simple brass nocking point or tied serving nock can be positioned using a bow square. The standard starting point for most recurve setups is approximately 3mm above square, but this varies by bow, arrow spine, and shooting style. Setting this yourself takes about ten minutes and costs next to nothing.
7. Personalize Aesthetics
Not every customization is functional. Many archers add colored string servings, custom string colors, limb decals, or dyed leather accents to make their setup feel uniquely theirs. These changes carry no performance benefit but do build attachment to the equipment, which can subtly increase practice motivation. For traditional recurve bow enthusiasts, finishing or oiling a wooden riser is another hands-on way to personalize while also maintaining the wood.
Common Mistakes to Avoid
- Over-tightening accessory bolts. It's easy to crack a sight bracket or strip a thread by applying too much torque. Firm and secure is the goal, not maximum force.
- Changing too many things at once. This makes it impossible to identify what's actually working. Patience with one change at a time is the most reliable method.
- Ignoring brace height. If you've twisted or untwisted your string without checking brace height, your bow's performance and safety profile may have shifted. Always verify.
- Choosing accessories based on appearance alone. A heavier stabilizer isn't always better. A sight with more adjustability isn't always more useful. Match the accessory to your actual skill level and shooting goals.
- Skipping paper tuning after adjustments. Any change to rest position, nocking point, or string configuration should be followed by some form of tuning verification before continuing regular practice.
- Using incompatible components. Not all sights, rests, or stabilizers fit every riser. Check thread standards (typically 5/16" or metric) and mounting style before purchasing.
Frequently Asked Questions
Can I customize any bow at home, or do some modifications need a pro?
Most accessory installations, string silencer fitting, grip modifications, and nocking point adjustments can be done at home with basic tools. Anything involving a compound bow's cam system, timing, or peep sight rotation typically benefits from a bow press and some prior experience. If you're unsure, having a bow technician verify your first compound tune is a reasonable step.
Will customizing my bow void the warranty?
It depends on the manufacturer and the type of change. Cosmetic modifications and accessory additions generally don't affect warranty coverage. However, adjusting limb bolts beyond the stated range or modifying the riser itself could. Always read your bow's documentation before making structural changes.
What's the most beginner-friendly customization to start with?
Setting your nocking point correctly and wrapping the grip are both low-risk, high-reward starting points. They require minimal tools, cost very little, and address two of the most common fit and consistency issues beginners face.
How do I know if a customization is actually improving my shooting?
Keep a basic practice log. Note your grouping size, arrow flight observations, and comfort level before and after each change. One session is rarely enough to judge — give any adjustment at least two to three practice sessions before drawing conclusions.
Final Thoughts
The most effective bow is the one that fits you, not the one with the most features. Starting with the DIY ways to customize your bow covered in this guide gives you a hands-on education in how archery equipment actually works — and that knowledge compounds over time. Make changes methodically, verify results, and let your setup evolve alongside your skill.