Skip to content
 cust@legendarchery.com
 302 503 5767
 Westfield IN 46074

Cutting and assembling carbon aluminum shafts is a skill that separates archers who get consistent results from those who keep chasing groups they can never quite close. Whether you're building arrows for target shooting or hunting, doing this process properly — in the right order with the right tools — makes a measurable difference in performance. This guide is written for intermediate archers and anyone who wants to stop relying on pre-cut shafts that may not match their setup.
Why Getting This Right Actually Matters
Carbon aluminum shafts, sometimes called A/C or carbon-core aluminum shafts, combine an aluminum inner tube with a carbon fiber outer layer. That construction gives them excellent straightness tolerances and a stiffer spine-to-weight ratio than most all-carbon or all-aluminum options alone. But that same construction also means small errors in cutting or assembly get amplified at the target.
An arrow that is cut unevenly, has a poorly seated insert, or carries dried adhesive buildup inside the nock end will fly inconsistently — not because your form is off, but because the arrow itself is the variable. Understanding the material before you start is why resources like this breakdown of what you must know about arrow shafts are worth reviewing before picking up a saw.
What You Need Before You Start
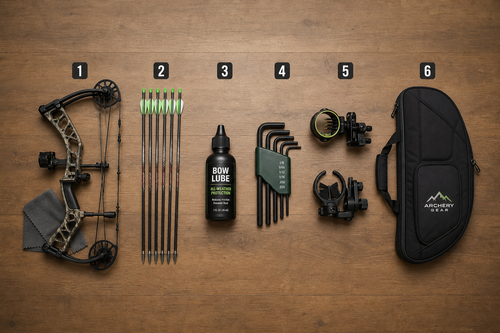
Do not start cutting until you have every tool on this list. Improvising mid-process usually means ruined shafts or unsafe cuts.
- Arrow saw or rotary cutting tool: A dedicated arrow saw with an abrasive or diamond wheel is the standard. Rotary tools can work but require a steady hand and a guide jig. Never use a standard hacksaw freehand.
- Arrow squaring tool (deburring tool): Mandatory for carbon aluminum. It removes burrs and squares the cut end so inserts seat flush and nocks align properly.
- Appropriate inserts: Match the insert to the shaft's inner diameter. Carbon aluminum shafts often use a specific insert size — check the manufacturer's spec sheet for your exact shaft model.
- Fletching jig and vanes or feathers: You will need a quality jig that holds the shaft without crushing it.
- Hot melt adhesive or two-part epoxy: Hot melt is standard for inserts when you want to be able to remove them later. Epoxy is more permanent. Use what suits your application.
- Nocks: Match the nock throat size to your bowstring diameter and verify the nock fits your shaft's accepted nock system (some carbon aluminum shafts use a press-in nock, others a pin nock system).
- Measuring tape or arrow ruler: Measure from the throat of the nock to the end of the shaft, not the tip of the point. This is the standard arrow length measurement.
- Isopropyl alcohol and cotton swabs: For cleaning the shaft ends before applying adhesive.
- Heat gun or lighter: For activating hot melt adhesive evenly.
Step-by-Step: Cutting and Assembling Carbon Aluminum Shafts
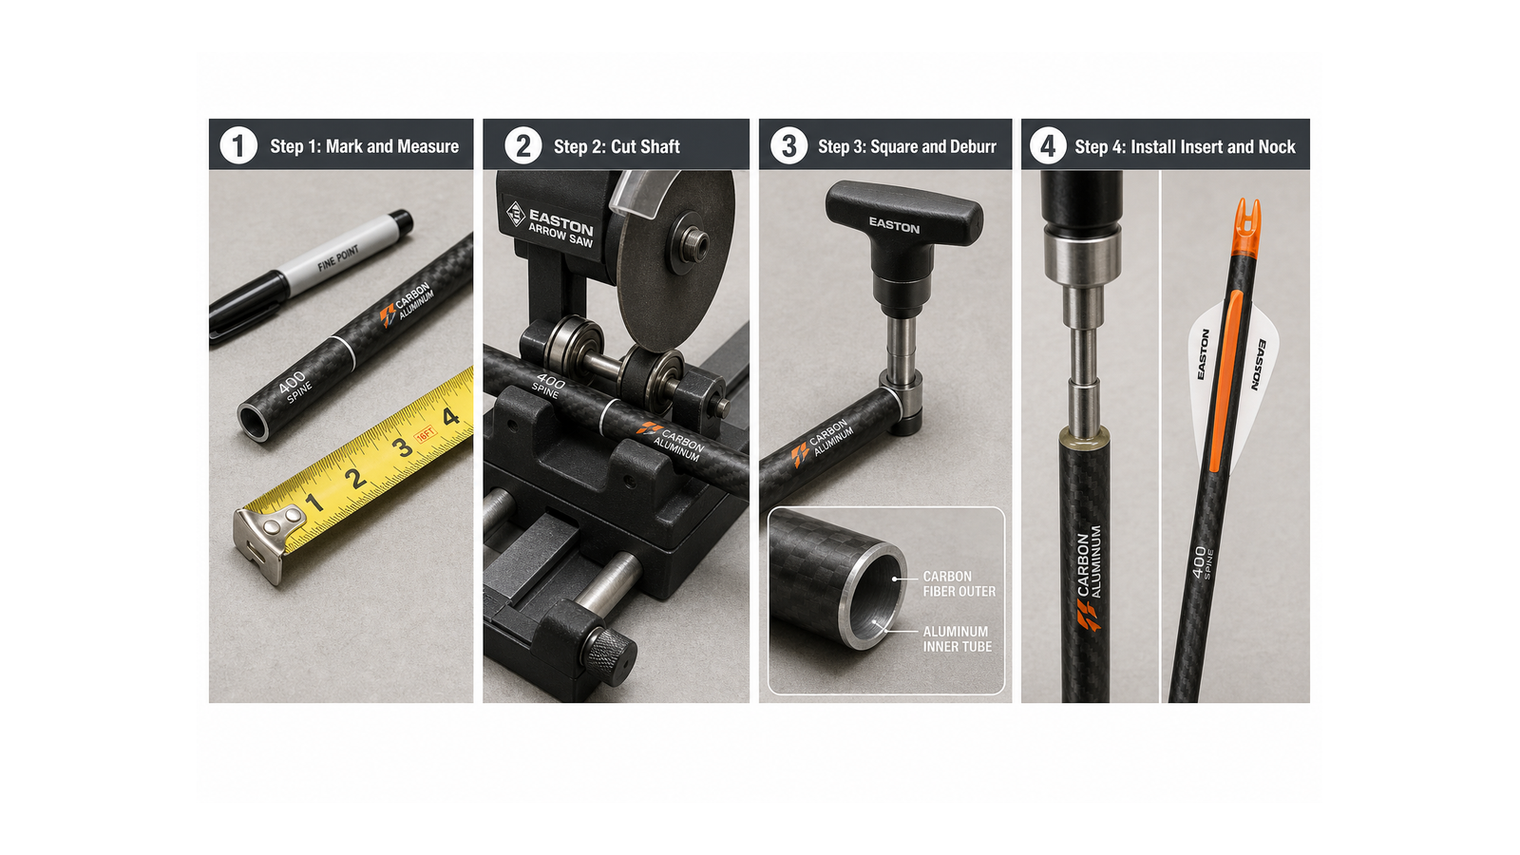
Step 1 — Determine Your Arrow Length
Start with your draw length. A common starting point is to add one inch past your pivot point (the deepest part of your bow grip) when at full draw. For most setups this puts the shaft tip just beyond the arrow rest when drawn. If you are unsure, have a shop measure your draw length with an overdraw arrow before committing to a cut length. Cutting too short is permanent. Start long, verify, then cut.
Step 2 — Mark All Shafts Consistently
Use a fine-tip marker and a straight edge or shaft marking tool to place a clean line around the full circumference of the shaft at your target cut length. Marking in one spot and eyeballing the cut is how you end up with angled cuts. A consistent mark gives the saw operator — or you — a reliable visual guide.
Step 3 — Cut the Shaft
Secure the shaft in the arrow saw's clamp or roller guide. Let the saw do the work — do not force the blade through the material. Carbon aluminum shafts cut cleanly when you use light, steady pressure and let the abrasive wheel do the cutting. Forcing the cut generates heat, can crack the carbon layer, or produce a jagged end that no squaring tool will fully fix. Cut all shafts to the same length before moving on.
Step 4 — Square and Deburr the Cut End
Insert the squaring tool into the cut end and rotate it several times with light pressure. This removes burrs from the aluminum inner tube and any fraying from the carbon outer layer. Run your finger carefully along the cut edge — it should feel smooth and flat, with no raised edges. This step directly affects how flush your insert seats and how true your nock alignment sits.
Step 5 — Clean the Shaft Ends
Wipe both the insert end and the nock end with isopropyl alcohol on a cotton swab. Any oil, dust, or carbon residue will compromise adhesive bonding. Let the shaft dry fully — about 30 seconds is enough in a normal shop environment.
Step 6 — Install the Inserts
For hot melt: apply heat to the insert (not directly into the shaft) until the adhesive flows, then press the insert firmly and straight into the shaft's tip end. Rotate it slightly as you seat it to spread the adhesive evenly. Wipe away any squeeze-out immediately with a cloth before it sets. For epoxy: apply a thin coat inside the shaft opening and on the insert collar, seat firmly, and set aside to cure per the adhesive manufacturer's timeline — typically 15 to 30 minutes for a working cure.
Do not overtighten or force inserts. If the insert will not seat smoothly, check that you have the correct size. Forcing an oversized insert into a carbon aluminum shaft risks delaminating the carbon outer layer.
Step 7 — Install Nocks
Press-in nocks should be seated with finger pressure or a nock-seating tool — not pliers, which can crack the nock or deform the shaft end. Align each nock so the index vane position will be consistent across all arrows. Most archers index the cock vane 90 degrees to the string. Pin nock systems require a nock adapter to be glued in first, then the pin nock snaps into the adapter.
Step 8 — Apply Fletching
Use your fletching jig per its specific instructions. Clean the shaft in the fletch contact area with alcohol first. Apply fletching adhesive in a thin, even line along the base of each vane. Clamp, allow to cure, and rotate to the next position. After all three or four vanes are attached, inspect each fletch base under good light — any lifted edge will cause drag and spin inconsistency.
Common Mistakes to Avoid
- Skipping the squaring step: Even a clean-looking cut has microscopic burrs that affect insert seating and nock alignment.
- Using too much adhesive on inserts: Excess hot melt or epoxy that flows into the shaft interior adds inconsistent weight and can block field points from fully threading in.
- Cutting all arrows without checking the first one: Always cut one shaft, build it out, and verify the length at full draw before processing the rest of the batch.
- Ignoring shaft spine after cutting: Shortening a shaft stiffens its dynamic spine. If you cut significantly shorter than the manufacturer's spine chart was calculated for, your arrow selection may no longer be appropriate for your bow weight. Check the spine chart again after any cut longer than half an inch.
- Rushing adhesive cure time: Shooting an arrow with an under-cured insert is how inserts end up downrange inside a target — or worse, inside the bow.
- Using the wrong nock for the shaft system: Carbon aluminum shafts from different manufacturers may have different nock systems. Always verify compatibility before ordering nocks in bulk.
How to Check Your Results
Before shooting a single arrow, run through this verification sequence:
- Spin test: Roll each finished arrow along a flat surface or spin it on a commercial arrow spinner. The tip should not wobble. Any wobble indicates a poorly seated insert or a bent shaft — set that arrow aside.
- Nock alignment check: Hold the arrow at arm's length and sight down it. Each nock index should be at the same rotational position relative to the vanes across the whole batch.
- Point thread check: Thread a field point into each insert by hand. It should engage cleanly and seat fully without wobble or cross-threading.
- Fletch adhesion check: Press lightly on each vane base. No lifting or flexing should be present. Any vane that lifts slightly will peel free after a few shots.
If you are building carbon arrows or working with aluminum arrows separately, the same principles around squaring, cleaning, and adhesive curing apply — though all-carbon shafts require extra care around fraying at the cut, and all-aluminum shafts are more forgiving to cut but still need deburring.
Frequently Asked Questions
Do I need a dedicated arrow saw or can I use a rotary tool?
A dedicated arrow saw gives the most consistent, square cuts with the least risk of damage to the shaft's carbon layer. A rotary tool with a cut-off wheel and a guide jig can produce acceptable results but requires more care and practice. Freehand cuts with any tool — including rotary tools — are not recommended for carbon aluminum shafts.
How do I know if my insert is properly seated?
A properly seated insert sits flush with or very slightly recessed into the shaft end, shows no lateral wobble when a point is threaded in, and shows a small, even bead of squeeze-out around the base (which you wipe away before it sets). If the insert sits proud of the shaft end, it was not fully seated — reheat or re-apply and press again.
Does cutting arrow length affect arrow spine?
Yes. Shorter arrows are dynamically stiffer than longer arrows of the same shaft. If you cut more than half an inch shorter than your original spine chart calculation, recheck your spine requirements for your bow's draw weight and cam style. This is a frequently overlooked step that leads to arrows that fly inconsistently despite correct assembly.
How can I tell if my finished arrows are straight and consistent?
Spin each arrow on an arrow spinner or roll it on a flat surface and watch the tip. No visible wobble at the point means the insert is seated straight and the shaft is not bent. Consistent nock index positions across the batch confirm your fletching jig was set up correctly. Shoot a small group and compare; significant spread with good form almost always points back to inconsistency in the arrows themselves.
Final Notes
The process is straightforward when you follow the sequence and do not rush the steps that require patience — adhesive cure time especially. Build one complete arrow first, verify everything, then process your full batch. Arrows built with this level of care will group tighter and last longer than anything cut and assembled in a hurry.