Artemis with a bow and quiver
The image of the lady huntress has been a popular archetype in all forms of literature from ancient times to modern film. Even from old patriarchal societies, there exist tales of rebellious women who ignored their supposed places and took up their bows to fight. These goddesses and heroines are the stories of the 7 legendary archer womest, whose skill with a bow and arrow have earned them a place among the most epic warriors in both modern and historical folklore:
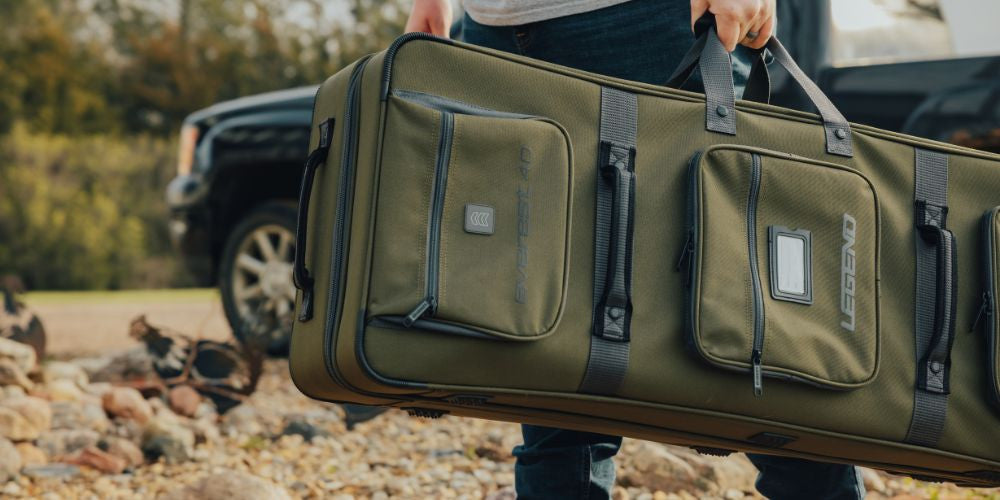
These female archers, whether fact or fiction, were known as the most legendary. Keep your compound bow safe from the elements with our Legend Apollo Compound Bow Case, which these archers definitely lacked, or visit our homepage for our extensive selection of archery accessories.
Accuracy is a major part of archery, whether you’re a beginner or an advanced shooter. Archers are always trying to improve their accuracy in order to get better penetration, and of course to get bragging rights. You see it with company ads all the time. They come out with these sights and rests that have been “designed with the archer in mind”, Guaranteed to make you more accurate.
Well that’s great that the equipment is good and promotes accuracy but what good is accurate equipment, if your inaccuracy is due to your inconsistent form. In this article I am going to give you 3 pointers that will help you to improve your form and therefore improve your overall shot accuracy.
The first pointer and probably the most important is that you need an Anchor point, I cannot stress this enough. If you take anything from this article take this pointer. It alone will improve your accuracy a great deal. When you draw your bow and are at full draw you have to find at least two points where you can anchor the string and your hand EVERY time you draw your bow.
When I’m shooting my first anchor point is putting my index knuckle behind my ear lobe, and my second anchor point is putting the string on the tip of my nose. In doing this I am guaranteeing that every time I shoot my bow I am going to be consistent therefore improving my shooting consistency and accuracy.
The second pointer is your stance, yes your stance does play a major role in your shot accuracy. When shooting at a target you want to be standing so that your side is pointing at the target.
Your feet should be pointing perpendicular to the target and should be a little less than shoulder width apart. The reason you want to stand this way is because it allows for the greatest stretch, so you can reach the full draw potential, and helps you to avoid letting the string creep forward on you before you let go, giving you the maximum speed from your bow.
The third pointer is your grip. The way you grip the bow has a big effect on where the arrow will end up. Grip can be broken down into 2 factors; the strength of the grip and the way the hand is wrapped around the bow handle.
When shooting your bow the best way to hold your bow is to put the center of the handle running down the muscle right under your thumb. You then want to place your 4 finger tips on the front of the handle (for diagrams visit the site listed below.
When you grip the bow you want to grip it just hard enough to keep it in your hand. The most common problem with gripping it tightly is that you tend to torque(twist) your bow either left or right and that causes the arrows flight pattern to be erratic, ending in missing the mark you aimed for.
Following these pointers will no doubt have you shooting more accurately and consistently than ever before. Now it does take a little while to get used to these pointers as most of us have to break our old habits and it also takes lot of practice to master true proper form but when you do finally get it you’ll be shooting like a pro.
If a person is serious about archery, he quickly learns that a good bow needs a bit of maintenance and some tweaking now and then for maximum performance. If you have a good archery shop in your area and happen to be best friends with the owner, you might not need your own home shop, but otherwise, it is a very wise investment. A person who masters the art of maintaining their bows and arrows will be able to better master the art of archery itself. Perhaps, the most essential element of the home archery shop is the bow vise.
An author writing of bow vises commented that attempting to work on your bow without one is like trying to fix the transmission of your automobile on the kitchen floor. This image gives a good idea of the value and main use of the bow vise. It is a tool that is designed to put your bow into a position where it can be “worked on” and to hold it there. The common bow vise mounts to a work surface and where it is used, that area becomes your own bow shop.
There are several other tools that are recommended for use in a home bow shop. It is possible to put together your own bow shop with an output of just under $500. Some of these items are a Chronograph which measures arrow speed. One of the main ideas of bow tuning is to increase arrow speed which increases penetration. A paper tuner is another tuning device. A paper tuner can be constructed from a simple cardboard box. It works by shooting an arrow through a piece of paper, such as butcher paper or even newspaper, into a target about an arrow’s length behind the paper. The idea is that a very small hole indicates a perfectly tuned arrow.
Two other elements of the home bow shop are a bow press and a portable tool box. When you have all of these, your home bow shop is fairly complete and you are able to improve, tune, and maintain your bows and arrows. It is the bow vise that is the key to this collection. They are available from a number of archery supply dealers. They differ from ordinary vises in their ability to rotate. This feature is reflected in names such as the “360 degree vise” or the “infinite position” vise. The idea is rotation of the bow to any position necessary to perform maintenance on it.
When you become serious about archery, you become serious about the care and maintenance of your bows and your arrows. The two are inseparable. Archery is a sport that is carrying on a tradition that dates back to the dawn of time. The early archers needed to be able to tune and improve their bows in order to survive. If you are serious about carrying on this ancient tradition, you must become skilled in the workshop as well as on the range or in the woods.
#1 Water vs bow
The most important thing to remember is that water is not the best friend of your archery equipment. Humidity getting into wooden elements will cause swelling and disfiguration. The best way to prevent this from happening is to store your bow in a dry place and not exposing it into rapid changes of temperature.
Not only water in the liquid form can harm your bow also ice build-up can have destructive impact on it. In extreme situations such as ice build-up near cams it can be even dangerous as may cause the string to roll off the cam. To avoid build-up of ice make sure to not leaving snow on it. It is also important in the winter to check for the ice build-up before drawing the bow.
#2 Inspection and prevention
It is a good and widely recommended practice to inspect a compound bow before each session. Shooting a bow that is not tuned or that is cracked may lead to its damage and can be also dangerous for you. When inspecting the compound bow you should pay attention to any unusual vibrations and loose elements.
#3 Do not to overdraw a compound bow
The unique construction of a compound bow enables comfortable aiming as the weight you keep in your hands once the bow is fully drawn is hugely reduced. You need to nonetheless remember to shoot it only when fully drawn. In modern compound bows overdrawing is prevented by utilization of “the wall”. Forcing the string over this limit may result in damage. If your bow does not suit your arm length you need to adjust the draw length of the bow. Most constructions allow for moderate adjustment that you can do yourself. Some bows may however require a use of a bow press.
#4 Cams synchronization
If you are an owner of a dual-cam compound bow you need to inspect the synchronization of the cams frequently. They may become desynchronized due to limb movement of stretching of the string. The synchronization of the cams has a huge impact on the accuracy.
#5 Wax the bowstring
Waxing bowstring prevents premature failure of this element. Make sure you use a proper silicone based blend. Do not under any circumstances use a candle wax. It will be counterproductive and instead of protecting your bowstring will destroy it. Silicone is used in bowstring waxes to protect it from water and also reduce fraction between fibres of the string.
A 3D archery course is basically a course in which a bunch of 3D animal targets are set up in bush, in real hunting scenario positions. Each target has a heart, lung and body section. In most cases a heart shot is 10pts, a lung shot is 8 pts and a body shot is 5pts. The goal is to stand at the specific marker that has been set for that animal, and guess the distance at which the animal is standing as well as where the vitals would be on the animal.
3D archery shooting is a really fun time and is even better when a group of people go and you make it a competition. In order to find a place near your area that offers 3D shooting events, you can go onto the internet and do a search of 3D shoots, when those results come up you will need to narrow it down to your state and city. Another good way to find out is to simply ask other archers, and bowhunters in your area.
Usually before entering onto the course there are target bags set up for practice shots. This is a great time to take a few shots just to make sure your bow equipment is working properly and to warm up your muscles. Make sure that if you have any questions at all make sure to ask around, other archers and the owners of the course are always more than happy to help out a fellow archer, especially if you’re new to archery or 3D shooting.
There are many different types of 3D animals you will be shooting at, the courses that I have seen I have shot at moose, bear, deer, alligators, beavers, raccoons, goats, and many others. Some of these animals are placed out to about 70 yards and can get pretty tricky to know where to shoot at but it is a whole lot of fun.
The best thing about 3D archery shoots however; is that fact that it’s almost like you’re hunting. There is no better way in my mind to practice for bow hunting than to shoot animal replicas set up in hunting like scenarios, with accurate vitals. 3D archery will teach you to judge distances quickly without the help of a range finder, it wil help to teach you where the vitals are on the different animals you will be hunting, it will also teach you the kind of tricks the trees and shrubs can play on your eyes ex, the tunnelling effect., and it will train you to be an overall better archer.
Let me just say that nothing will make you happier than when that 10 point buck comes out into that clearing in front of you and you will have seen that dozens of times before when shooting the 3D course, and you will know exactly how far he is and where to shoot.
While archery is known to be one of the safest sports in the world, ranking somewhere between ping pong and golf, about once a year there is an archery accident that gains attention in the sport’s community. Typically, these injuries are caused by firing damaged or improperly fitted arrows, and are usually completely avoidable. Here are a few tips to help you buy arrows of the right size and test them for damage before shooting.
The most common way for an arrow to become damaged is after it has already been shot, and is hit by another arrow fired at the target. Today’s bows can propel an arrow upwards of 270 feet per second, making the archer capable of achieving very tight group patterns. The downside of these tight groups is that when one of these arrows collides with another arrow already in target, it can damage or destroy the arrow.
Inspect Each Arrow Before Use
A simple way to avoid injuries or equipment damage due to firing a faulty arrow is to perform the ‘flex test’ on each arrow before use. To perform this test, simply hold the ends of the arrow in each hand and gently flex the arrow away from yourself (and other people… ideally at the ground, for that matter… ) while listening for any cracks or pops and visually scanning the arrow for dents, cracks, splintering, or any other problems. Rotate the arrow and flex it from several directions until you are sure it is not damaged.
If one of your arrows does exhibit signs of damage, don’t take any chances or bemoan the cost of a lost arrow. Just destroy it and move on. It is always better to be safe than endure the cost of hospital bills or equipment repairs.
Buy Arrows of Proper Size
Always make sure your arrows are long enough that they do not stand the chance of falling off your arrow rest (even partially) when at full draw. In general, the front end of the arrow shaft should line up evenly with the front of your riser at full draw.
Also, remember that your draw length will change over your time as your bowstring stretches out with repeated use. Buy arrows that are slightly longer than draw length, keep your string properly waxed, and replace it every few years and you should have no problem.
Make Sure your Arrows are Nocked
Some of the more common archery accidents occur when an arrow is not fully nocked. At best, this causes the arrow to fall while in the draw portion of the shot, potentially resulting in a dry fire that can damage your bow or leave a welt on your bow arm. At worst, the arrow can fall after you have released the string, causing it to take an unintended and unpredictable flight path.
While it can be easy to blame the arrow when an accident happens, ultimately the responsibility lies in the hands of the shooter. Never assume an arrow is safe before firing. Take the time to flex test every arrow before shooting, and especially if you know the arrow made contact with another.
While Archery ranks among one of the safest sports in the world, taking the time to teach these rules to children, and modeling them your self will ensure archery continues to remain one of the safest and most rewarding lifetime sports in the world.
Whether you have been shooting for years or you have just recently gotten involved with archery, you will find that nothing can improve your shooting the way that a release aid can. You’ll find that it can be handy in every shooting situation through decreasing string torque or removing it all together, and that over all, it will aim towards improving your arrow’s flight.
When you are thinking about choosing release aids, the first thing that you will need to identify is what type of shooting that you usually do. There are several types of release aids out there, and they all have different features that will allow them to specialize for your specific sport. You will find that the difference between the aids that you use for tournament shooting, for target shooting and for bow hunting are all quite different, and that while you can use the same release aid for all three, that it will be beneficial for you to know what you are looking at.
Wrist Type Release Aids
When you are looking at wrist releases, you will find that they can be triggered by the index finger and that the anchor will be under the cheek or chin bone. With a wrist type release aid, you will find that the weight and the tension is being held by the wrist, which will allow your hand and your fingers to stay completely relaxed. The stress of drawing the bow will be held through the forearm and distributed down to the back, allowing you a more steady aim. Wrist type releases tend to be excellent for long distances. These are fairly popular with bow hunters due to the simplicity of their design and the power of the release.
Hand Held Release Aids
The first type of hand held release aids use the thumb and forefinger to release, allowing for a great deal of sensitivity in the distribution and release of the tension. Keep in mind that this can be something of a drawback as it does allow for a quick, but occasionally jerky release. You may prefer a thumb release, which will simply allow you to squeeze the trigger or you can use a third finger trigger release where you can simply squeeze the release trigger with your third finger. These releases do take some time to master and you will want to try a few before you really decide what you want. Hand held release aids are popular with both target archers and bow hunters.
Automatic Trigger Release Aid
When you are looking at the automatic trigger release aid, you will find that there is no trigger to push or punch. You will find that there is an automatic timer in these release aids that will allow you to aim and then for the arrow to release, with options for the release to shut down or halt by pressing a button. This is an electric device that runs off a battery and some do come with a mechanical backup. This is an aid that is best used by tournament shooters and are not ideal for beginners.
After using a good release aid, you will find that your shooting gets a lot more consistent. Remember to take some time to think about what release aid will be the most beneficial for you and your bow.
Which type of release do you use ? Let us know in comments.
There are few sports that can be enjoyed by every member of the family. The five best things about archery as a family sport can be summed up in one word: togetherness. Everyone in the family can benefit from the five best things about archery.
I enjoy archery with my husband, son, and grandson. The archer does not need to go hunting; the same benefits can be achieved from target shooting. Just gather your family and do it!
Okay, you bought the compound bow, now you need to accessorise, every accessory you add to your bow and arrow serves a primary function. Most of them resulting in better accuracy and precision.
A bow stabilizer is no different, understanding its function and how they can help you is the first step in determining if you need or want one.
A bow Stabilizer serves two main functions:
Now truly understanding what a Stabilizer is and why its performance is important, is the first step in determining whether you use one or not. lets examine the two functions.
What is the makeup of a Stabilizer?
Unlike the first stabilizers on the market, when they were made up of heavy metal tubes, the stabilizers of today are actually made up of carbon or plastics.
Now, even though one of the main functions of the stabilizer is weight, the carbon or plastic material remains durable and lightweight enough to perform as well as metal without causing too much weight to your bow. At the end of the stabilizer tube itself is the weight, the weights main purpose is to counter balance the bow, thus keeping it stable when being shot, consequently allowing your arrow to follow a straighter path to its target. The stabilizer is designed so the weight sits at the front of the bow giving you more consistency in aiming. The outcome is better accuracy for the archer, time and time again.
In the tubing just before the weight in a stabilizer, is a component of vibration absorbing materials, likely made up of mostly rubber, this is called the dampening device. Its this dampening device that allows the stabilizer to perform its second function, which is reducing the vibration the bow makes when releasing the arrow, ultimately giving you a quieter shooting bow.
A simple bow quiver full of broadhead arrows will serve the same purpose as a stabilizer for adding weight, if that is all your looking for is weight. But if your looking to reduce vibration or hand shock, then yes a stabilizer is what you want.
There are many different stabilizers on the market today, but again, like most things in archery, you have to determine whether your going to be target shooting or hunting with your bow.
Typically, target shooting models are much longer, usually 2 - 3 feet, then hunting models, which are 6 - 8 inches and only weigh about 3 - 10 ounces.
Another thing to keep in mind, the longer the stabilizer the more steady your bow will be and consequently the more accurate you will be. Which is why the longer models are used for target archery shooting or competition shooting. But when it comes to walking through the woods, they can be quit cumbersome, which explains the shortness of the hunting mode
Buying a compound bows is a big investment, its not one you want to make every year and is certainly not one you have to make every year. Even if you're just getting started, there are compound bows that adjust to grow with you, and depending on your age when you start, may be the only bow you need to buy.
Yes, there are those who need the "latest" and "newest" every year or every other year, but to truly enjoy the sport of archery, you really only need to invest once maybe twice in a compound bow. Now like most things worth investing in, it should be worth investing the time to properly take care of, because the key to a successful hunt is a well maintained bow. So how do you take care of a compound bow?
The first and probably the most important part of taking care of your bow, is purchasing a bow case. When is the last time you spent a lot of money on something and left it set outside in the elements? In the back of your truck or hanging in your garage is not a good place for this investment. Excessive heat, dampness, dirt and pests, all play a big role in deteriorating your compound bow. Proper storage in either a hard sided case or a soft sided case is very beneficial.
The next thing you should pay attention to, is the Bow Strings and Cables. Bowstrings and cables need to be frequently and regularly waxed. This will help keep them strong and from becoming fuzzy and worn. Inspect your strings and cables after each use and look for signs of "fuzziness" then give them a wax treatment. Get into the habit of doing this and you will be confident that your bow will withstand hunting in damp conditions and your strings and cables will remain strong.
Other areas to pay attention to the axles and bushings, for these you want to use a good bow oil, (you're manual should have this information) give them a few drops after each outing into the brush. Some compound bows don't require this kind of lubrication so you want to make sure you check your manual first. Always, always, always check your bow limbs for cracks, dents, or any sign of ware, before and after you shoot. And then always have a professional look at and fix the problem. Your warranty should cover this. Never try to fix this on your own.
And then check limb bolts and tighten any that are loose, a simple set of Allen wrenches is all you need. Finally, wipe down your compound bow of any dirt and grime from the days outing. By doing this each and every time you use your compound bow will keep you confident of its ability to perform well, and will help in making your investment last for years to come.