Skip to content
 cust@legendarchery.com
 302 503 5767
 Westfield IN 46074


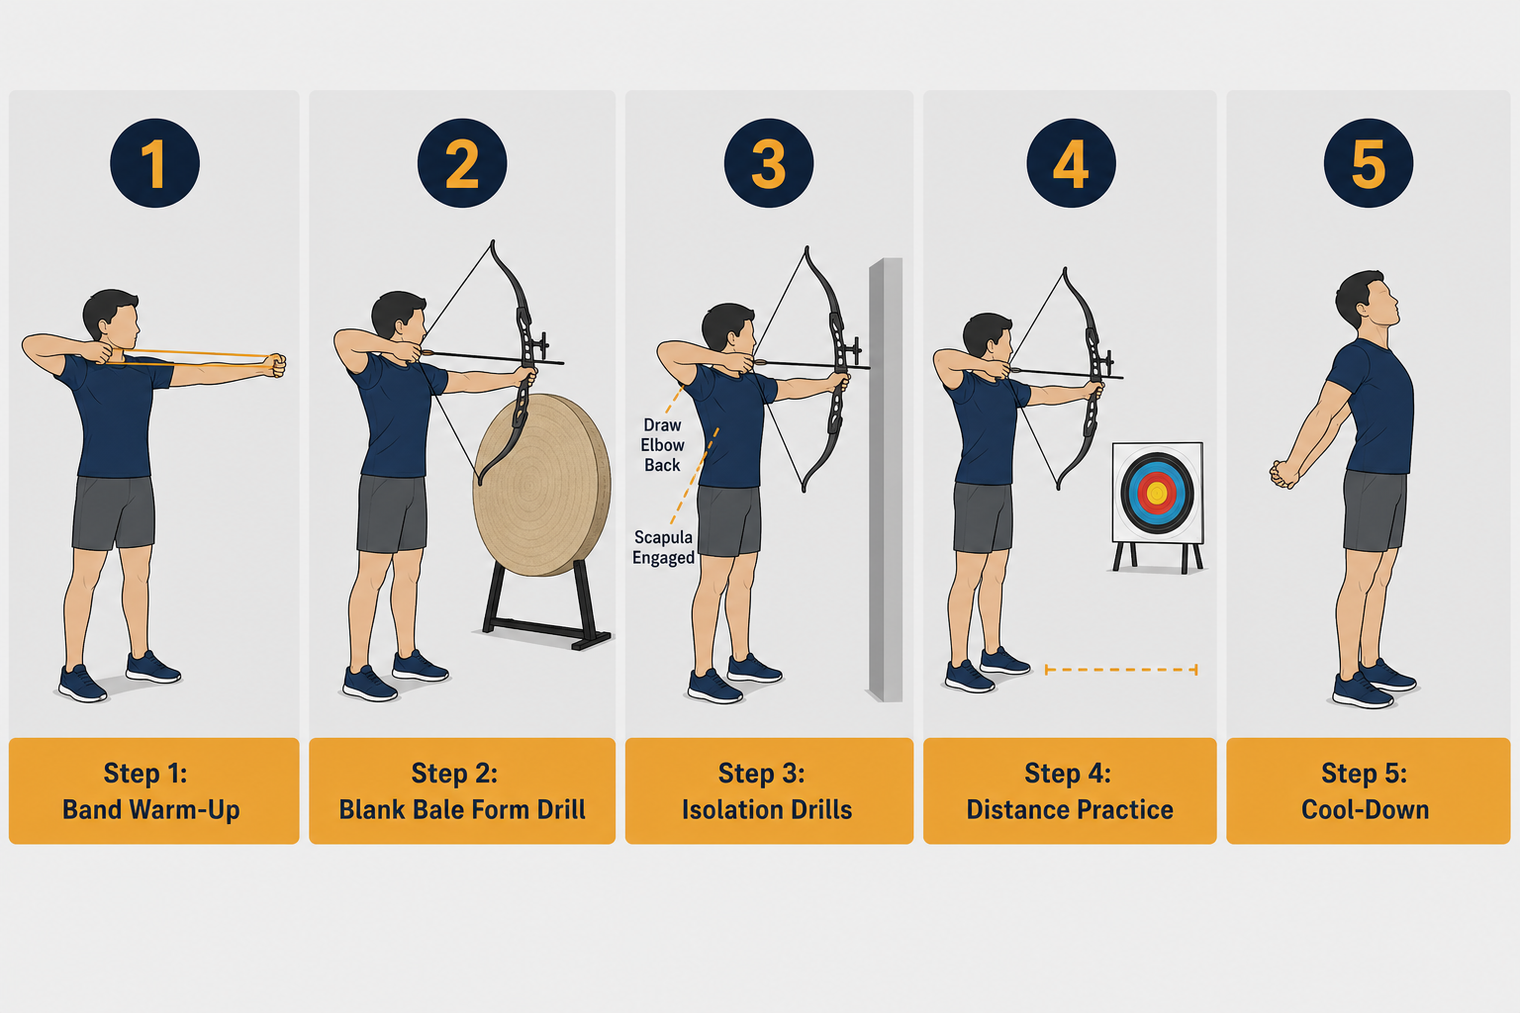
Most archers plateau not because they lack talent but because their practice lacks structure. Adding purposeful exercises to your training sessions — rather than just shooting arrows — is what separates consistent improvement from spinning your wheels. This guide walks you through exactly how to build and apply an exercise-based archery training routine, whether you shoot recurve, compound, or traditional.
Why Exercise-Based Training Produces Better Archers
Shooting arrows alone is not the same as deliberate training. Repetitive shooting without addressing underlying weaknesses reinforces bad habits. Exercise-based training breaks the process into components — posture, draw mechanics, muscle endurance, and mental focus — and develops each one independently before combining them under full draw. This approach accelerates skill acquisition and also reduces the risk of overuse injuries in the shoulder, rotator cuff, and drawing elbow.
Archery is more physically demanding than it looks. Draw weight, shot volume, and tournament pressure all require genuine physical conditioning. Archers who train their bodies alongside their technique show more consistent groupings and recover faster between competition days.
What You Need Before You Start
Before running through any drill sequence, make sure the following are in place:
- A properly fitted bow: Draw length and draw weight must match your current ability. Training with a bow that is too heavy accelerates bad form.
- Resistance bands: Theraband or similar resistance bands replicate draw motion without requiring a bow. Useful for warm-up and muscle isolation work.
- A blank bale or close-range target: Many form drills are done at close range — one to three metres — so you can focus entirely on mechanics without chasing arrows.
- A mirror or recording device: Visual feedback is essential. You cannot feel what you cannot see, especially in the early stages.
- A training log: Record what you practise, how many reps, and what you noticed. Patterns emerge over weeks, not days.
If you are sourcing equipment or replacing worn training gear, resistance bands and targets come from general sports and archery retailers. Legend Archery's online shop covers carrying and protection gear: bow cases, quivers, backpacks, arrow tubes and arm guards.
Step-by-Step: How to Use Archery Exercises in Training
Step 1 — Warm Up With Band Work (10 Minutes)
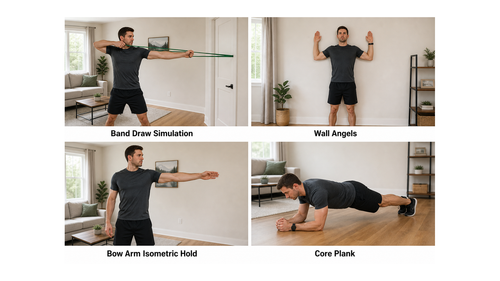
Cold muscles under load cause injury and poor movement patterns. Start every session with resistance band exercises that mirror the draw sequence:
- External shoulder rotations — 3 sets of 15 reps each side
- Scapular retractions — 3 sets of 12 reps, holding briefly at peak contraction
- Straight-arm band pulls mimicking your draw direction — 2 sets of 20 reps
These activate the posterior shoulder, rhomboids, and the stabilising muscles around the scapula — all critical for a steady, repeatable draw.
Step 2 — Blank Bale Form Drill (5 to 10 Minutes)
Stand one to three metres from a blank bale. Remove the pressure of aiming entirely. Your only job is to execute the shot cycle — set-up, pre-draw, draw, anchor, hold, release, follow-through — with full attention on each position. Shoot 20 to 30 arrows this way at the start of every session. Treat each arrow as its own separate event.
Common checkpoints during blank bale work:
- Is your bow arm elbow rotated clear of the string path?
- Are your shoulders staying down and level at full draw?
- Is your draw elbow tracking directly behind the arrow line?
- Is your release hand moving straight back, not swinging outward?
Step 3 — Isolation Drills for Weak Points (10 to 15 Minutes)
After blank bale work, move into targeted drills that address your specific weaknesses. Common isolation exercises include:
- The wall drill: Stand parallel to a wall with your bow arm touching it lightly. Draw with a resistance band. The wall prevents collapsing and teaches correct skeletal alignment.
- Draw and hold sets: Draw to anchor and hold at full draw for 10 to 30 seconds before releasing. This builds back tension and endurance specific to your draw weight.
- Clicker timing drill (recurve): Focus solely on consistent expansion through the clicker without rushing. Shoot 10 arrows with the entire focus on smooth, controlled clicker passage.
- Trigger discipline drill (compound): With a back tension or hinge release, practise the firing sequence without watching the sight. Focus only on trigger pressure and back engagement.
Step 4 — Structured Distance Work (20 to 30 Minutes)
Once your mechanics are warmed up and reinforced, move to full-distance shooting. Do not just shoot ends. Apply structure:
- Shoot in sets of 3 or 6 arrows, scoring each end.
- After each end, review your process — not just where arrows landed.
- If groupings break down, return to blank bale before continuing.
- Use a shot routine timer if you compete. Practise under the same time pressure you will face on the line.
Step 5 — Cool Down and Mobility (5 to 10 Minutes)
Finish with shoulder stretches, chest openers, and thoracic mobility work. Archery creates strong imbalances — the draw side tightens over time. Regular post-session stretching reduces injury accumulation across a full season.
Common Mistakes to Avoid
- Skipping the warm-up: Jumping straight into full-distance shooting with cold muscles embeds poor movement patterns and risks shoulder strain.
- Prioritising arrow count over quality: Shooting 150 sloppy arrows teaches you to shoot sloppily. Reduce volume and raise attention instead.
- Training the same drill every session: Once a weakness is corrected, move on. Repeating the same drill indefinitely stops being productive.
- Ignoring fatigue signals: Form breaks down predictably when you are fatigued. If your groups are scattering in the last third of a session, end the session — do not try to push through.
- No feedback mechanism: Practising without a mirror, video, or coach means you are guessing. What feels correct is often not what is actually happening.
- Jumping draw weight too early: Increasing draw weight before the supporting muscles are conditioned forces compensatory movement and reinforces incorrect form under load.
How to Tell If Your Training Is Working
Progress in archery is not always linear, but there are clear indicators that your structured training routine is producing real results:
- Group consistency improves before score improves: Tighter, more predictable groups — even if not centred — mean your mechanics are becoming more repeatable.
- Form holds later in a session: If your technique used to deteriorate after 30 minutes but now holds for 60, your supporting muscles are stronger.
- Mental clarity during the shot: You stop overthinking and the shot routine becomes automatic. This is a sign that deliberate practice has transferred into muscle memory.
- Blank bale feedback improves: Return to blank bale work periodically and review your video. Compare it to footage from 4 to 6 weeks earlier. Changes that feel small often look significant on camera.
If you are building a more complete training setup — including targets, stands, or accessories for home practice — browsing outdoor archery supplies can help you find what fits your training environment.
Frequently Asked Questions
How often should I include exercise drills in my archery training sessions?
For most recreational and club-level archers, integrating structured drills into every session — even if just the warm-up band work and blank bale phase — produces better results than saving drills for occasional sessions. Consistency matters more than frequency in any single week.
What mistakes do archers most commonly make when adding exercises to training?
The biggest mistake is treating drills as optional add-ons at the end of a session when energy is low. Drills should come first, when focus and physical capacity are highest. The second most common mistake is not tracking what was practised, making it impossible to measure whether anything is actually improving.
Do I need special equipment to do archery training exercises properly?
Not necessarily. A resistance band, a blank bale, and something to record yourself are enough to run a meaningful training session. A bow is not always required — band work and wall drills can be done without one. That said, having well-fitted, reliable equipment makes it easier to isolate technique variables without chasing equipment problems.
How do I know if my form has actually improved or if I am just getting used to shooting badly?
Video review is the most reliable method. Compare footage from six weeks apart while shooting at a blank bale. Scores can fluctuate for many reasons, but consistent video evidence of improved skeletal alignment, a calmer release, and steadier follow-through are genuine markers of technical progress.
Conclusion
Structured exercise-based training turns practice time into genuine development. The sequence matters: warm up, reinforce mechanics, isolate weaknesses, apply under distance, and recover properly. Track what you do, review your results, and adjust. If you are setting up or upgrading your training equipment, Legend Archery's shop is a good starting point for finding what you need.