Skip to content
 cust@legendarchery.com
 302 503 5767
 Westfield IN 46074

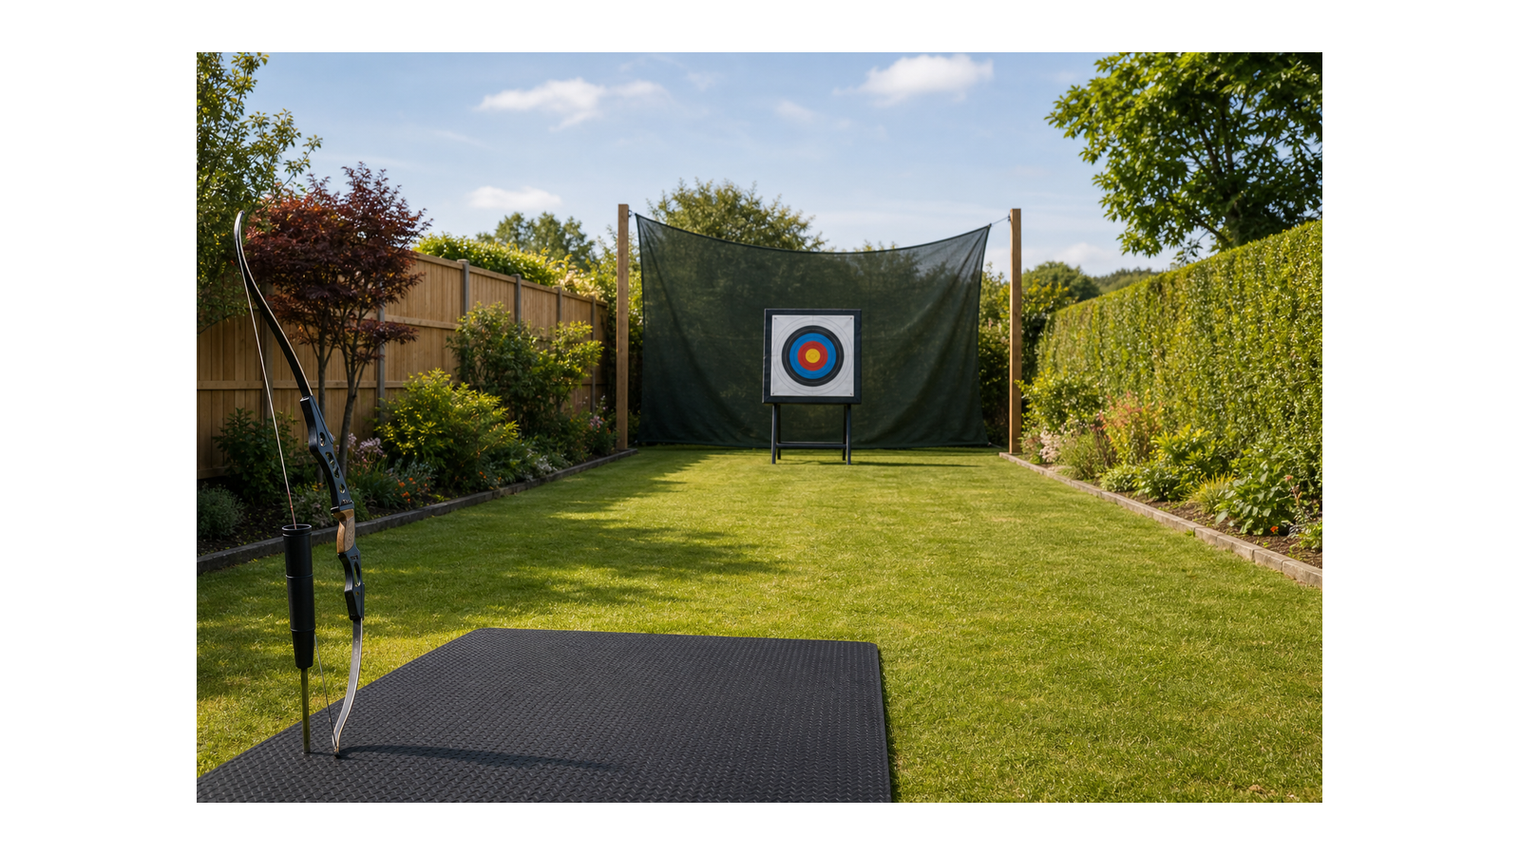
If you have even a modest outdoor space, you can build a functional home archery range. Whether you shoot a recurve, compound, or traditional longbow, the principles are the same: safe shooting lanes, reliable target stops, and a setup you can use consistently. This guide is for anyone from complete beginners to returning archers who want dedicated practice space without driving to a club.
Why a Dedicated Home Range Changes Your Practice
Convenience is the obvious benefit, but the deeper value is repetition. Club ranges have booking windows, travel time, and social pressure. A backyard setup lets you shoot ten arrows before dinner, work on a specific form fault without an audience, and track your progress week over week. Archers who shoot frequently in short sessions almost always improve faster than those who only shoot at weekend sessions.
That said, a poorly planned home range creates real hazards. Arrows travel further than most people expect, and a missed target can send a shaft over a fence or into a garden wall at speed. Getting the fundamentals right from the start is not optional.
What You Need Before You Start
Before you move anything outside, work through this checklist:
- Space measurement: Know your available shooting distance. Even 10 metres is workable for beginners; 18 to 20 metres is the indoor Olympic standard and suits most recurve and compound practice.
- Local rules and permissions: Check your local council bylaws or homeowners association rules. Some areas restrict discharge of projectiles within residential boundaries, even on private land.
- Background and neighbours: Walk behind where your target will stand. What is in the arrow flight path if you miss? A solid fence, earth bank, or thick hedge provides passive protection.
- Lighting and weather exposure: Consistent lighting reduces aiming error caused by shadows. Consider whether your range will be waterlogged after rain, which affects both your footing and target longevity.
- Equipment inventory: You need a target, a backstop system, target stand or frame, and your bow and arrows. Additional items like a quiver stake, arrow puller, and target face clips improve the daily experience significantly.
Step-by-Step: Building Your Backyard Archery Range
Step 1 — Define Your Shooting Lane
Mark a straight line from your shooting position to the target location. This is your shooting lane. Nothing should cross this line when shooting is taking place. If you have children, pets, or family members who share the garden, install a physical marker or barrier — a simple rope or cones works — and establish a clear signal for when the range is live. A flag or light that indicates "range hot" is a low-cost habit that prevents accidents.
Step 2 — Install a Reliable Backstop
This is the single most important safety element. A backstop sits behind your target and catches any arrow that passes through or around it. Common options include:
- Straw bale wall: Two to three bales stacked wide enough to extend at least 30 cm beyond each edge of your target face. Straw stops arrows well and is easy to source, but it degrades outdoors and needs replacing seasonally.
- Archery backstop netting: Purpose-made netting rated for archery use. It should be hung with enough depth to allow the net to deform and slow the arrow rather than acting as a rigid wall. Check the weight rating matches your bow draw weight.
- Earth bank: If your garden has a natural slope or you can build up a compacted soil bank, this is the most permanent and weather-resistant option. The bank should be at least 50 cm deep at the point of impact.
Step 3 — Choose and Mount Your Target
Target choice depends on what you shoot. Field points work with foam block targets and layered foam bag targets. Broadheads require a specific broadhead-rated target or a dense foam block. Mounting your target at the correct height matters more than most beginners realise: the gold should sit at eye level when you are standing at your shooting position, which is roughly 130 to 140 cm from the ground for most adults. A tilted or low target changes your shot angle and builds bad form habits.
Use a purpose-built target stand or frame rather than leaning targets against walls. Leaning targets move when struck and can fall forward onto arrows, bending or snapping them. For outdoor ranges, peg the base of any stand into the ground to prevent wind movement.
Step 4 — Prepare Your Shooting Position
Your shooting position needs to be level, stable, and free of obstructions. Uneven ground causes inconsistent stances; a paving slab, rubber mat, or compacted gravel strip gives you a reliable surface. Mark your distance lines with spray paint, pegs, or ground tape so you can return to the same spot each session without measuring again.
If you shoot in multiple directions (for instance, rotating targets to vary your practice), make sure each shooting position has its own backstop coverage mapped. Do not assume one backstop covers all angles.
Step 5 — Organise Your Equipment Storage
A small weatherproof box or shed shelf near the range keeps your arrows, spare nocks, an arrow puller, and a target face roll accessible without making trips back to the house. Arrows left outside in UV light degrade faster, and moisture warps wooden shafts. Store them indoors after each session but keep your consumables — spare target faces, repair tape, wax — near the range for convenience.
For a full selection of equipment suited to outdoor practice, browse the outdoor archery supplies at Legend Archery, where you can find targets, backstop nets, stands, and accessories in one place.
Step 6 — Test the Range Before Full Use
Before your first proper session, shoot five arrows from each planned position at slow, deliberate pace and observe where they hit and what happens if they miss. Check:
- Does the backstop catch arrows cleanly without them deflecting sideways?
- Is the target stable after repeated hits?
- Are there any angle-of-fire issues you did not notice during setup?
- Can anyone enter the shooting lane from behind your position without you knowing?
Common Mistakes to Avoid
- Underestimating arrow penetration: Foam targets rated for lower draw weights will not stop arrows from a 60 lb compound. Always match target rating to your bow specification.
- Skipping the backstop: Many beginners set up just a target with nothing behind it. Even experienced archers miss. A backstop is not optional.
- Shooting too close to boundaries: Leave a minimum of 2 metres of clearance between your backstop and any fence, wall, or property line. Arrows that deflect travel unpredictably.
- Using a target positioned too low or too high: This trains incorrect vertical aim compensation and translates to poor form on a proper range.
- Ignoring weather damage: Straw targets and foam blocks left outside in wet conditions deteriorate rapidly. A target that has become soft or saturated will not stop arrows reliably.
- Not informing household members: A consistent range protocol — verbal signal, physical marker, or flag — prevents accidents and sets good safety habits for younger archers learning at home.
How to Know Your Range Is Set Up Correctly
A well-built home range feels intuitive to use and requires no guesswork before each session. Use these indicators to assess your setup:
- Every arrow you shoot either hits the target or is stopped by the backstop with no deflection risk.
- You can move from one end of the lane to the other, collect arrows, and return to the shooting line without stepping over or around hazards.
- The target face is readable at distance and the gold is clearly centred at eye level.
- Your shooting position feels the same every time — same surface, same distance markers, same stance reference.
- After several sessions, your arrow groups are tightening, which confirms your form is improving on a consistent platform rather than fighting variable conditions.
If you are expanding your home setup or refreshing your equipment after the off-season, the Legend Archery shop carries a wide range of targets, stands, backstop netting, and accessories suited to home ranges of all sizes.
Frequently Asked Questions
How much space do I actually need for a backyard archery range?
Ten metres is workable for beginners focusing on form. Most archers find 18 to 20 metres gives more meaningful practice. You also need at least 2 metres of clearance behind the target for the backstop, and a few metres behind your shooting line for comfort and safety.
What is the biggest mistake people make when setting up at home?
Skipping the backstop. A target alone is not enough. Arrows pass through worn foam, miss target edges, and deflect off hard surfaces in unpredictable directions. A rated backstop net or solid earth bank behind the target is essential before any shooting takes place.
What equipment do I actually need to get started?
The core items are a target rated for your bow's draw weight, a backstop system, a stable target stand, your bow, and matched arrows. A ground quiver and arrow puller are low-cost additions that genuinely improve daily use. For sourcing everything together, check out the range of outdoor archery supplies available at Legend Archery.
How can I tell if my range setup is actually safe?
The clearest test is to intentionally shoot wide of the target during your first session and observe where those arrows go. If every miss is caught by your backstop without deflection, the setup is working. If arrows disappear or bounce sideways, your backstop coverage needs adjustment before regular use continues.
Final Thoughts
A functional home archery range does not require a large budget or a big garden. It requires methodical planning: defined lanes, a proper backstop, a height-correct target, and consistent safety habits. Get those fundamentals right and you have a practice space that genuinely accelerates your development as an archer.