Skip to content
 cust@legendarchery.com
 302 503 5767
 Whitestown, In 47075
Mastering the art of recurve bow tuning can feel like navigating a maze of intertwined settings. You can tweak an almost infinite number of elements, but the challenge is determining which ones to adjust. What about the order? What sequence must you follow for perfect bow tuning? What must you avoid? There are so many factors worth noting. It’s no wonder many archers find themselves questioning whether or not they have the right tuning.
In this article, we'll show you the most straightforward and effective approach to mastering your bow tuning abilities with ease and certainty. Furthermore, we'll provide you with a set of tuning tests that will be useful for years to come. Some require more effort than others, but after you've done them once or twice, they'll become second nature.
Without further ado, let’s get started!
What is Recurve Bow Tuning?
Recurve bow tuning involves adjusting your recurve bow to your shooting style to achieve the best performance and arrow flight as an archer. Arrows, vanes, the bow itself, the bowstring, tiller, stabilizers and weights, the cam's location and timing, the arrow rest's height, and bow blade are all components that go into the tuning process.
To acquire the highest possible points with your gear, you need to set it up properly and ensure it has the right weight to enable your arrows fly as well as they possibly can. When a bow is properly tuned, even a beginner can improve their shooting and make strides in the sport.
Basic Principles Of Recurve Bow Tuning
You can achieve proper recurve bow tuning by following these guidelines:
- Take your time to warm up and avoid tuning when the wind is blowing strongly.
- All the arrow's parts must be intact and in good condition; there should be no bent tips, ripped fletches, or dinked nocks.
- Use the actual gear you intend to use for the shoot. Don't use a brand-new string and tab to compete after tuning the old ones.
- At least three bare and fletched arrows (in alternate sequence) are required for bare shaft tuning.
- Be sure to double-check your bare shaft tuning from multiple distances. Both 18m and 30m are good options. You can also choose between 15m and 25m if you prefer a closer target.
- Select a target size for tuning that allows you to shoot 36 arrows and obtain a score of 340 or above.
- Take it slow and tweak only one thing at a time. Before committing to your final tune, you should test it several times over several days.
How to Carry Out Recurve Bow Tuning
Before you get started, ensure that all the items you’ll be using on your recurve bow are installed – like stabilizers, bow sight, string, and quiver, among others. You want your bow to be as complete as possible because you will likely need to make recurve tuning adjustments whenever you introduce a new component. This is a critical step that, in my experience, is often overlooked by archers, particularly those who are only experienced with a crossbow (which typically requires very minimal tuning, if any).
Turning a recurve bow involves several steps. See our detailed guide on how to tune a recurve bow down below.
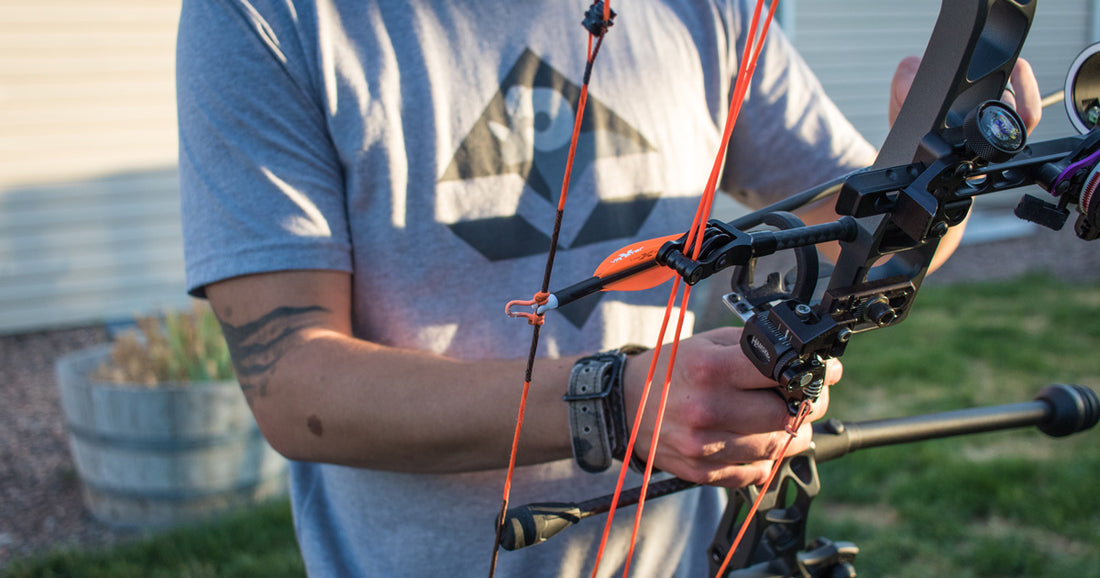
Step 1: Determine the exact location of the nocking point

Correctly placing the nocking point is a crucial first step in fine-tuning your recurve bow. The nocking point is the designated spot where you nock your arrow each time you want to take a shot. Make sure to purchase a nocking point with your bow, as they usually don’t come with the package. Unless you buy an entire recurve bow set with arrows and everything included.
A measuring instrument called a "bow square" or "T-square" is employed to find the bow's nocking point. You’ll need to place the bow square flat on the arrow rest of the bow and observe to see the exact point where the “square” meets the bowstring.
Next, fasten the bow’s nock point exactly half an inch above the spot you just located. The intersection of the T-square and bowstring is the ideal nocking point.
When installing the point, ensure it is positioned approximately half an inch above “square”. Square refers to the imaginary line that extends from the surface of your arrow rest and forms a 90-degree angle with the bow string when in its loose position.

Place your nocking point 0.5″ above the horizontal line as seen above. You may need to adjust this slightly, but we’ll get to that later in the recurve tuning process.
You must be gentle to achieve precision. The nocking points should not be over-crimped or tightened. Complete the task with the pinpoint accuracy required to keep the square in place.
At this point, it’s worth mentioning that your arrow nock should have a proper fit for the nock point on your string. As a rule of thumb, you want the fit to be tight enough so that the arrow can hang freely from the string, with the nock/nock point perfectly supporting the arrow’s weight. At the same time, the arrow should be able to disengage if the string is given a firm tap (with your hand) a few inches away from the nock end.
Step 2: Micro-Tune Your Bow’s Brace Height
Next, you should examine whether your bow's brace height is optimal. This is important if you wish to keep your recurve bow quiet and reduce vibrations as you fire arrows. Your bow's brace height is the distance between the bowstring and the deepest part of the grip when the bow is at rest. Depending on the type of bow you're shooting, a reasonable starting point for brace height is anywhere from 7 to 9.5 centimeters from the riser.

Brace height tuning is achieved by adjusting the bowstring twists to effectively shorten or lengthen its dimensions. The result of this is an addition or reduction of tension in the bow’s resting limbs, bringing them closer or pulling them further apart.
Generally, the more twists a bowstring has, the longer the brace height. Similarly, as more twists are removed from the bowstring, the shorter the brace height becomes.
By twisting or untwisting the bowstring, you can change the height of the brace to suit your needs. The more twists you add at the tip of the string, the more “flexed” it becomes, pulling the limb tips slightly away from the riser and increasing brace height. Similarly, if you want to decrease the brace height, you will reduce the number of twists on the string. The instruction manual that comes with your recurve bow will include the manufacturer’s recommendation for an acceptable brace height range.
Your goal is to twist and untwist the bow string until you reach a brace height that results in the best arrow flight and the least noise and vibration when an arrow is shot.
Tuning your brace height involves a sequence of trial and error. But be sure to get it right. If your bow’s brace height is too short, you will likely have issues with arrow clearance. On the other hand, an overly extended brace height will lead to short stopping of the bow limbs and, consequently, loss of power.
Step 3: Configure the tiller
Now that you have set your brace height, we can move on to the tiller. To tune the tiller, we must take note of the tiller height. This measurement is similar to brace height, but there are no individual recommended values in this case. Instead, we focus on the difference between the upper and lower tiller heights.

To change your tiller, follow these steps:
- Before making any changes to the tiller, it's a good idea to measure the tiller's present height in relation to the user's upper and lower limbs. After that, find the mathematical difference between the tiller heights of the upper and lower limbs.
- Check manufacturer recommendations for tiller height; most bowmakers provide one. The best tiller height should be specified in the user manual. In the absence of specific guidance, a tiller height of 5/32 inches (4 mm) is commonly recognized as adequate.
- Loosen the tiller locking bolt located at the rear of the riser; this is standard on most bows. If not, the tiller may shift each time the bow is put away. Typically, a 5/32" (4 mm) hex wrench is used to unscrew this bolt.
- You can adjust the tiller height by either tightening or releasing the two limb bolts. As the limb bolt is tightened, the tiller length is reduced. The tiller length can be increased by freeing the limb bolt. The draw weight will be slightly modified by tightening or loosening a single bolt. You may fine-tune the tiller for your particular hook design by adjusting the limb bolts to your liking.

Step 4: Straighten out the bow limbs
Prior to firing, check that the limbs of your bow are properly aligned. This is because, with time, the limbs of your recurve bow may get somewhat bent or deformed. Aligning the bow limb ensures the bow reacts better, draws and shoots in a straight line, is quieter and more forgiving, and makes it easier to set the center shot.
You can use a limb gauge for this or just lay the bow down and measure the angle it makes with the ground. It needs to be parallel to the floor. It's important to remember that 1/16 inch to at least 1/8 inch is the ideal offset range to work within throughout this phase. It is recommended that all adjustments be made with an arrow nocked to verify that they are within the specification range.

Step 5: Attach the arrow rest
The arrow rest must be attached and configured next. Plastic arrow rests that adhere to your bow will not allow for any adjustments. On the other hand, a wire arrow rest can be adjusted to fit your needs.
You can tape or screw your arrow rest onto the arrow rest bushing to keep it in place. Arrow rests are attached by tightening the matching screw into the bushing at the front of the bow, from where the arrow will be released.
Bare Shaft Tuning And Accuracy Testing For Recurve Bows
Your arrow can now fly more accurately since you've made the necessary adjustments; now, let's fine-tune the rest of the parameters so you can increase your chances of striking your target every time! In this section, you'll learn about various tests you can perform to confirm that you have properly tuned your recurve bow and any other adjustments necessary. You'll need both fletched and unfletched arrows, or "bare shafts," for these tests.
This process is carried out by shooting several fletched arrows into a target from a fixed distance. If the arrow grouping is consistent, proceed to shoot “bare” or unfletched arrows into the same target while maintaining the same point of aim. Any differences observed between the impact points of the fletched and unfletched arrow groups will guide you in making necessary adjustments.
Test 1: Porpoising
This is the first thing we’ll be looking for. Porpoising happens when the arrow alternates between rising and “submerging” relative to its intended arrow flight path. It is the rising and diving motion of a flying arrow. The image below demonstrates this in action:

It’s called “porpoising” because the arrow behaves mid-flight, almost like a porpoise (a mammal from the dolphin/whale family) does in water. If your arrow behaves as shown in the image above, the location of your nocking point needs adjusting. Here is how to carry out the bare shaft test:
- Aim for a distant object that is around 20 yards away.
- Fire fletched shafts towards the target, aiming for a precise spot.
- Switch out your arrows for some bare shafts and fire from the same distance, keeping your aim at the same spot.
- Now, walk up to the target and examine where your arrows landed.

You can fix porpoising by changing your nocking point following the steps below:
- If the bare shafts landed higher than the fletched arrows on the target, your nocking point is installed too low on the string. You will need to move the nocking point slightly higher (starting point 1/8″), then repeat the two-step bare shaft test described above. Keep adjusting the height of your nocking point and testing until both your fletched and un-fletched arrows land at the same height on the target.
- If the bare shafts landed lower than the fletched arrows, the nocking point was too high. You will need to move it down the bowstring until both your fletched and unfletched arrows land at the same height on the target.
For this test to work, it is imperative that you always aim for the exact same spot when shooting the arrows and the bare shafts, stand at precisely the same distance from your target each time you shoot, and use the same draw/aim/release technique.
The goal is to ensure both the fletched arrows and the bare shafts (unfletched arrows) land on the same horizontal plane.
Test 2: Fishtailing
Arrow fishtailing describes a left-to-right deviation from the ideal arrow fight. It is the most common indication of inappropriate arrow spine values and should be treated accordingly. To check for fishtailing:
- Aim for a distant object that is around 20 yards away.
- Fire fletched shafts at the target, aiming for a specific spot.
- Switch out your arrows for some bare shafts and fire from the same distance while aiming at the same spot on the target.
- Walk up to the target and mark where the arrows landed.

Here's a list of things you can do depending on what you see on your target:
Conspicuous Leftward Shift in the Arrow's Flight Path
Your arrows probably have a rigid spine if the bare shafts tend to point this way. Solutions you might want to consider are;
- Loosening the plunger on your cushion to reduce tension or adjusting the arrow rest, so it is closer to the bow's riser (this will recenter your arrows and bring the arrow points closer to the bowstring).
- Making use of heavier arrowheads.
- Increasing the brace height on your recurve bow.
- Swapping out the arrow shafts for more flexible options.
Conspicuous Rightward Shift in the Arrow's Flight Path
Your arrows probably have a weak spine if the bare shafts all point in this direction. Possible adjustments include:
- Tightening the cushion plunger to increase tension or moving the arrow rest further away from the recurve bow's riser (this will recenter your arrows and move the arrow points further away from the bow string.)
- Using slightly lighter arrowheads.
- Decreasing the brace height on your recurve bow by ⅛ - ¼ inches.
- Switching to more rigid arrow shafts.
The goal at this point is to make sure your arrows land as close to each other as possible by making the necessary tuning adjustments and changes as described above.
Please note: I created the images above, assuming you use a right-handed bow. If you’re a “leftie,” everything will be reversed. Unfletched arrows landing too far to the left indicate a weak arrow spine. While unfletched arrows landing too far to the right will indicate a stiff spine.
Test 3: Arrow Clearance
Finally, you need to ensure that the arrow is "cleared" from the string and has not touched the bow. Arrow clearance refers to the arrow's capability to “clear” the bow without the fletchings on the arrow making direct contact with the bow. Proper clearance will improve your shooting accuracy and tighten your arrow grouping. This becomes more crucial at longer ranges since even minor deviations in arrow flight become more hazardous at those distances.
Here's a rundown of things to do to ensure your arrows fly undisturbed and to make any necessary modifications along the way.
- Choose a suitable powder so you can see where it makes contact. Common examples include talc, dry deodorant, and flour.
- Line up your preferred detection agent along strategic areas, including the arrow rest and all parts of the arrow from three inches in front of the fletching all the way back, including the fletching itself.
- Fire an arrow and check to see if the powdered spots show any signs of "tracking".
- If there is no sign of tracking, then there are no clearance issues. However, some fine-tuning will be required if the reverse is the case. Identify where your arrow is making contact with the rest so you can fine-tune the rest and other parts as needed.
Typical solutions for clearance problems include:
- Adjusting the fletching placement on your arrow by rotating the nock slightly.
- Replacing with fletchings of lower profile, or
- Recentering your arrow to get extra clearance.
Repeat the test after making adjustments to determine if you’ve achieved the desired result.
Final Thoughts
Archery and accuracy go hand in hand. Optimal accuracy stems from properly tuned equipment as much as quality marksmanship. Making an effort to fine-tune your recurve bow to your arrows can significantly improve your shooting accuracy and help you shoot your full potential. However, it is crucial to carry out recurve bow tuning according to the standard specifications discussed in this article to prevent the limbs or the riser from being ruined.